Difference between revisions of "Ultimate Augment"
(Created page with "right Ultimate Augments are purchased from the Hive Queen in Stonehive, using the Buzzing Berries alternate currency.<br> Buzzing Berri...") |
|||
| (41 intermediate revisions by 5 users not shown) | |||
| Line 1: | Line 1: | ||
| − | + | Ultimate Augments are purchased from the [[Hive Queen]] in [[Stonehive]], using the [[Hive Shards]] alternate currency.<br> | |
| − | Ultimate Augments are purchased from the [[Hive Queen]] in [[Stonehive]], using the [[ | + | [[Hive Shards]] are acquired from the [[Catacombs of Dranik]], [[Bloodmoon Temple]], and [[Blackburrow|Old Blackburrow]].<br> |
| − | [[ | + | <br> |
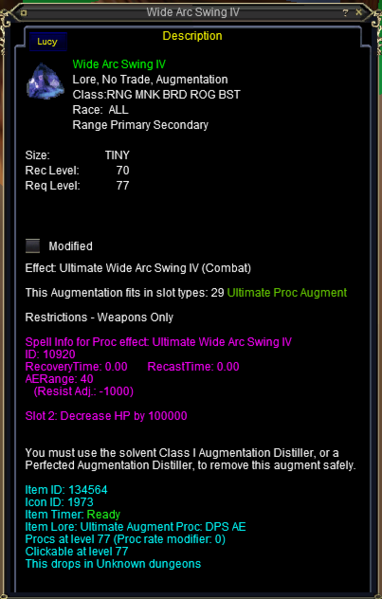
| + | Hatestomp IV, Wide Arc Swing IV, Life from Pain IV and Amplify Vulnerability can be upgraded in [[Kael Drakkel]]<br> | ||
| + | Get the armor quest from Gearloose (Rot Vendor)<br> | ||
| + | Hand in 20 x armor pattens to receive a Ultimate Augment Upgrade Gem | ||
| + | ---- | ||
| + | === Augment Upgrade Tokens === | ||
| + | |||
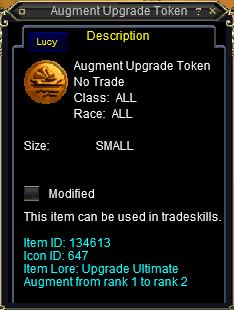
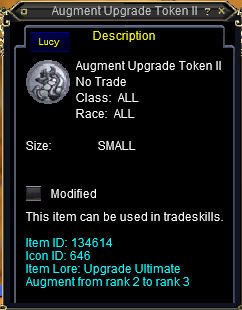
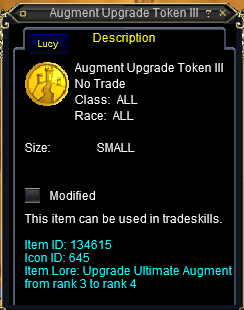
| + | Some Ultimate Augments can be upgraded, combine the augment with the correct upgrade token in a [[magic box]].<br> | ||
| + | Rank I Augment + Augment Upgrade Token = Rank II<br> | ||
| + | Rank II Augment + Augment Upgrade Token II = Rank III<br> | ||
| + | Rank III Augment + Augment Upgrade Token III = Rank IV<br> | ||
| + | |||
| + | === Kael Drakkel Upgrades === | ||
| + | Rank IV Augment + Ultimate Augment Upgrade Gem = Rank V<br> | ||
| + | Amplify Vulnerability + Ultimate Augment Upgrade Gem = Amplify Vulnerability II<br> | ||
| + | <br> | ||
| + | <gallery mode="packed-hover" widths=200px heights=300px> | ||
| + | Image:upgradetoken.png|Augment Upgrade Token|link={{filepath:upgradetoken.png}} | ||
| + | Image:upgradetoken2.png|Augment Upgrade Token II|link={{filepath:upgradetoken2.png}} | ||
| + | Image:upgradetoken3.png|Augment Upgrade Token III|link={{filepath:upgradetoken3.png}} | ||
| + | Image:uaug.png|Ultimate Augment Upgrade Gem (Kael)|link={{filepath:uaug.png}} | ||
| + | </gallery> | ||
| + | |||
| + | = Upgradable Augments = | ||
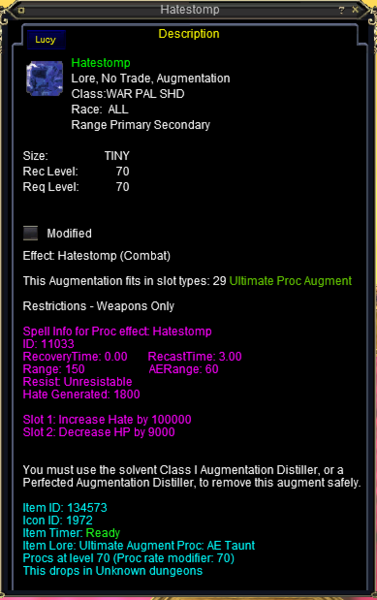
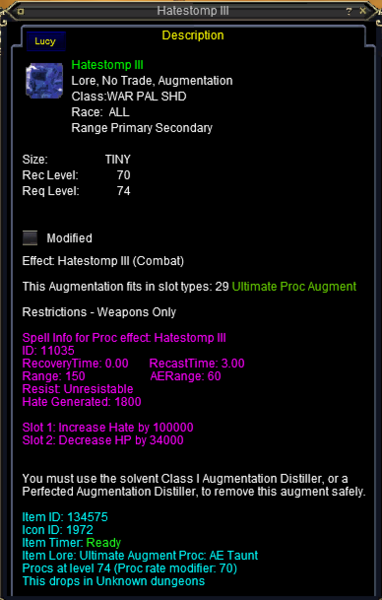
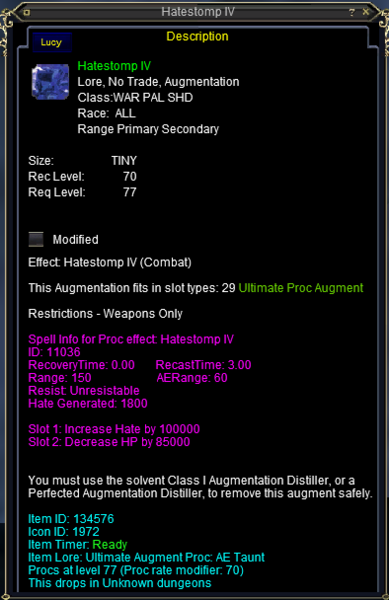
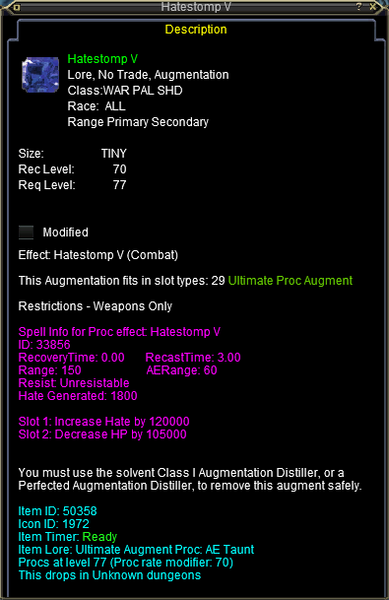
| + | === Hatestomp === | ||
| + | <gallery mode="packed-hover" widths=200px heights=400px> | ||
| + | Image:hs1.png|Hatestomp|link={{filepath:hs1.png}} | ||
| + | Image:hs2.png|Hatestomp II|link={{filepath:hs2.png}} | ||
| + | Image:hs3.png|Hatestomp III|link={{filepath:hs3.png}} | ||
| + | Image:hs4.png|Hatestomp IV|link={{filepath:hs4.png}} | ||
| + | Image:hs5.png|Hatestomp V (Kael)|link={{filepath:hs5.png}} | ||
| + | </gallery> | ||
| + | |||
| + | === Ultimate Protection === | ||
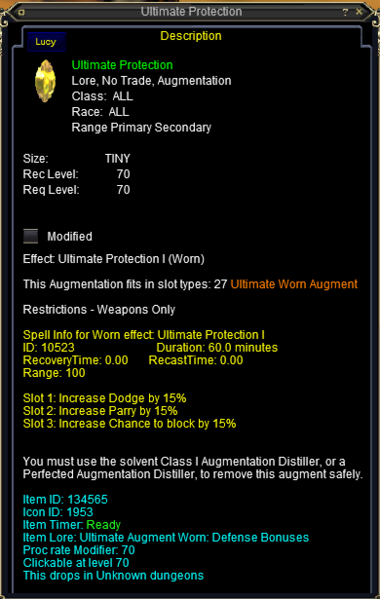
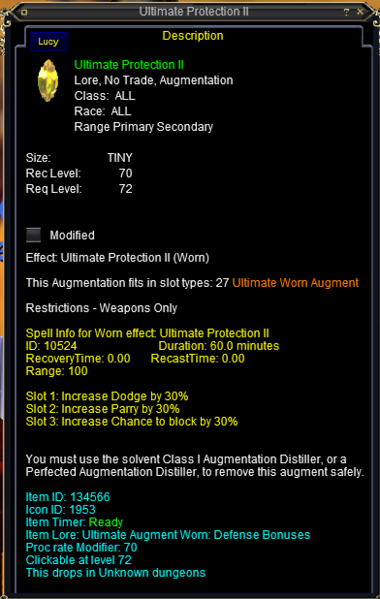
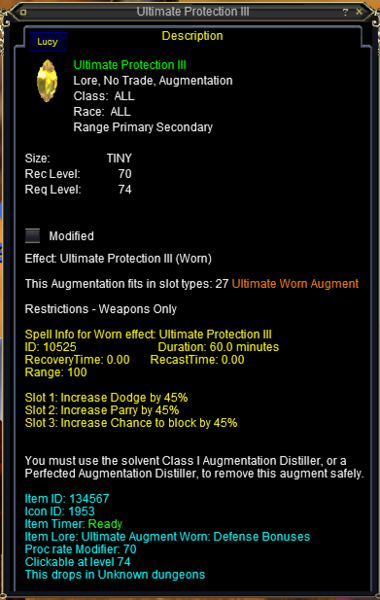
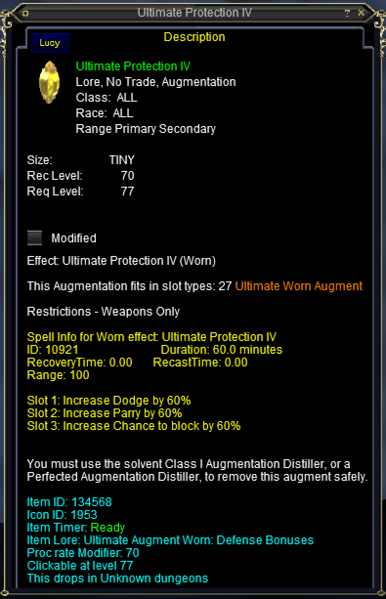
| + | <gallery mode="packed-hover" widths=200px heights=400px> | ||
| + | Image:up1.png|Ultimate Protection|link={{filepath:up1.png}} | ||
| + | Image:up2.png|Ultimate Protection II|link={{filepath:up2.png}} | ||
| + | Image:up3.png|Ultimate Protection III|link={{filepath:up3.png}} | ||
| + | Image:up4.png|Ultimate Protection IV|link={{filepath:up4.png}} | ||
| + | </gallery> | ||
| + | |||
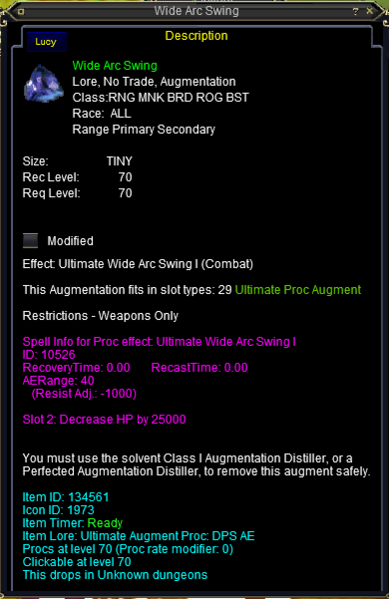
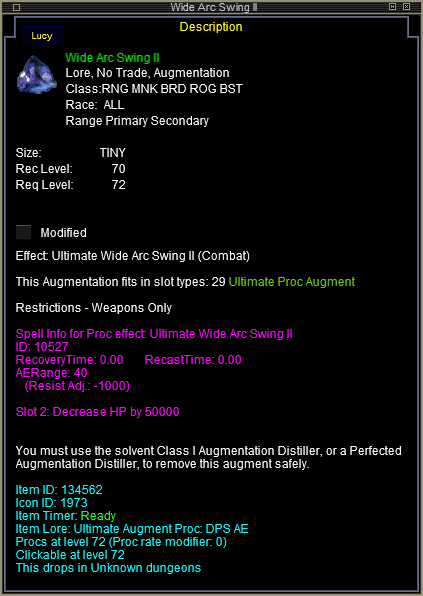
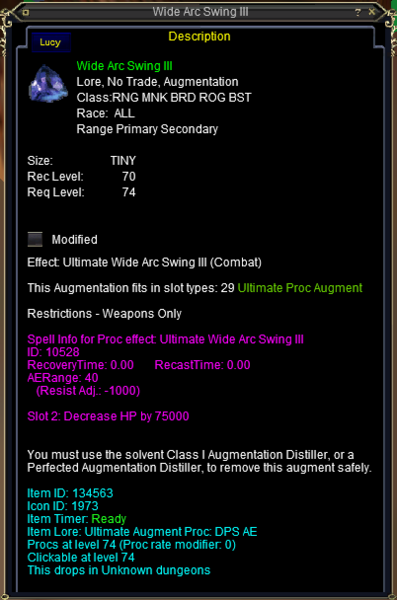
| + | === Wide Arc Swing === | ||
| + | <gallery mode="packed-hover" widths=200px heights=400px> | ||
| + | Image:was1.png|Wide Arc Swing|link={{filepath:was1.png}} | ||
| + | Image:was2.png|Wide Arc Swing II|link={{filepath:was2.png}} | ||
| + | Image:was3.png|Wide Arc Swing III|link={{filepath:was3.png}} | ||
| + | Image:was4.png|Wide Arc Swing IV|link={{filepath:was4.png}} | ||
| + | Image:was5.png|Wide Arc Swing V (Kael)|link={{filepath:was5.png}} | ||
| + | </gallery> | ||
| + | |||
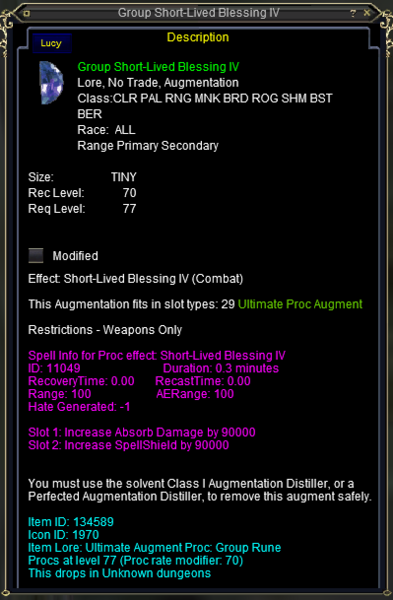
| + | === Group Short-Lived Blessing === | ||
| + | <gallery mode="packed-hover" widths=200px heights=400px> | ||
| + | Image:Gslb1.png|Group Short-Lived Blessing|link={{filepath:Gslb1.png}} | ||
| + | Image:gslb2.png|Group Short-Lived Blessing II|link={{filepath:gslb2.png}} | ||
| + | Image:gslb3.png|Group Short-Lived Blessing III|link={{filepath:gslb3.png}} | ||
| + | Image:Gslb4.png|Group Short-Lived Blessing IV|link={{filepath:Gslb4.png}} | ||
| + | </gallery> | ||
| + | |||
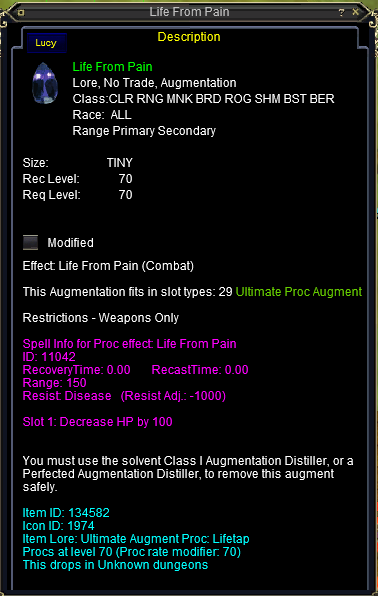
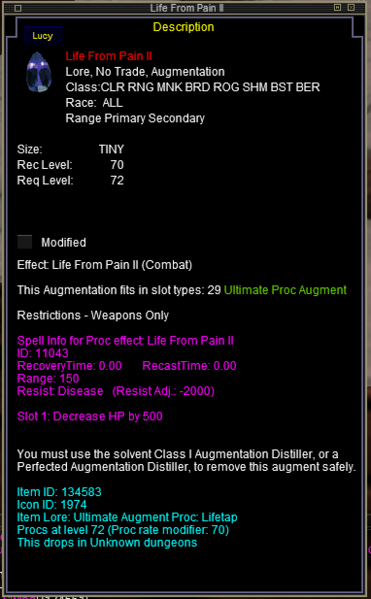
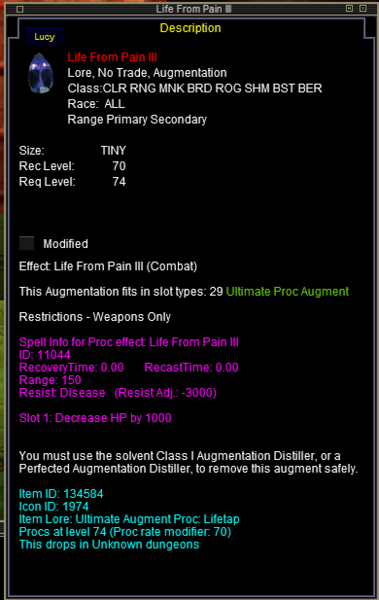
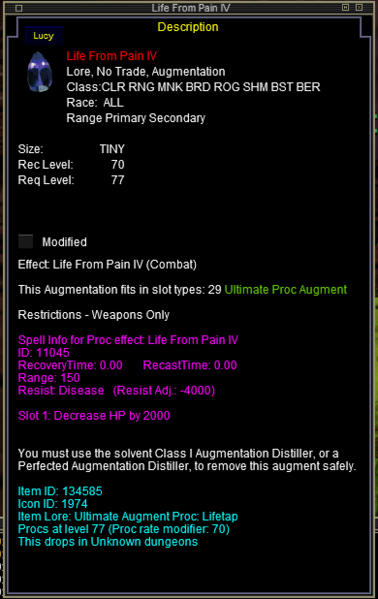
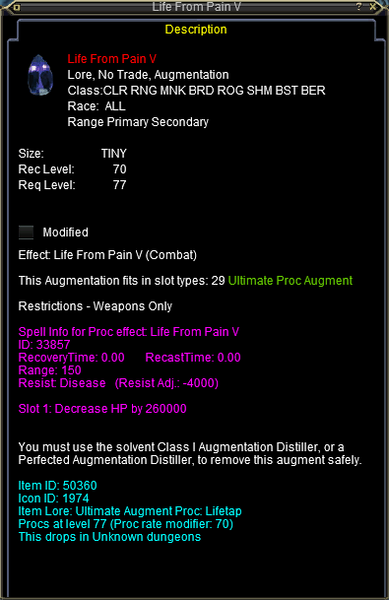
| + | === Life From Pain === | ||
| + | <gallery mode="packed-hover" widths=200px heights=400px> | ||
| + | Image:lfp1.png|Life From Pain|link={{filepath:lfp1.png}} | ||
| + | Image:lfp2.png|Life From Pain II|link={{filepath:lfp2.png}} | ||
| + | Image:lfp3.png|Life From Pain III|link={{filepath:lfp3.png}} | ||
| + | Image:lfp4.png|Life From Pain IV|link={{filepath:lfp4.png}} | ||
| + | Image:lfp5.png|Life From Pain V (Kael)|link={{filepath:lfp5.png}} | ||
| + | </gallery> | ||
| + | |||
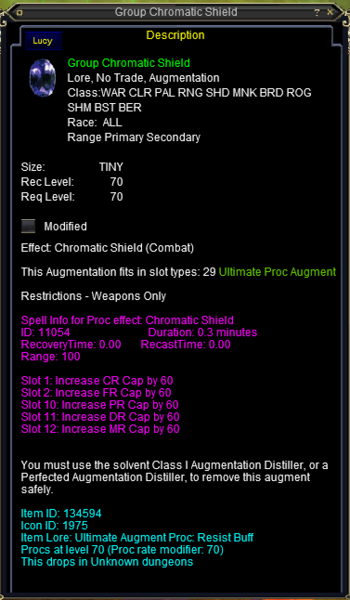
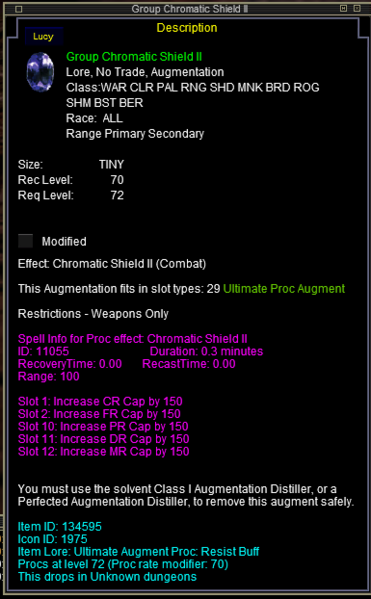
| + | === Group Chromatic Shield === | ||
| + | <gallery mode="packed-hover" widths=200px heights=400px> | ||
| + | Image:gcs1.png|Group Chromatic Shield|link={{filepath:gcs1.png}} | ||
| + | Image:gcs2.png|Group Chromatic Shield II|link={{filepath:gcs2.png}} | ||
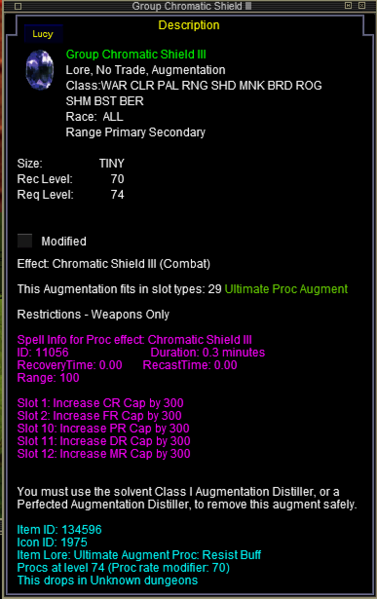
| + | Image:gcs3.png|Group Chromatic Shield III|link={{filepath:gcs3.png}} | ||
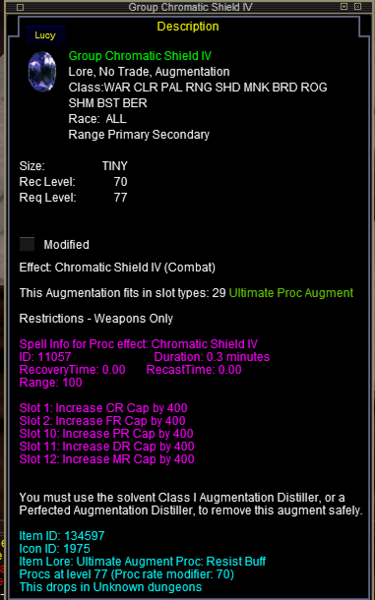
| + | Image:gcs4.png|Group Chromatic Shield IV|link={{filepath:gcs4.png}} | ||
| + | </gallery> | ||
| + | <br> | ||
| + | |||
| + | === Mighty Thorns === | ||
| + | <gallery mode="packed-hover" widths=200px heights=400px> | ||
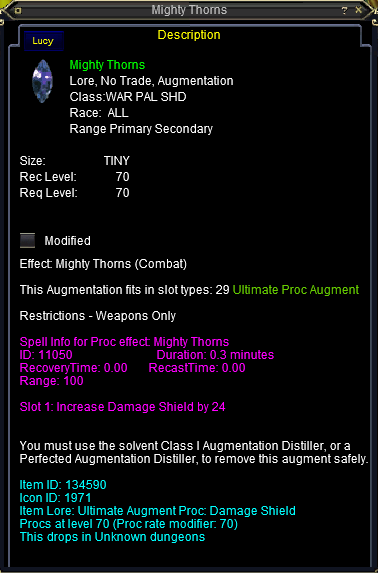
| + | Image:mt1.png|Mighty Thorns|link={{filepath:mt1.png}} | ||
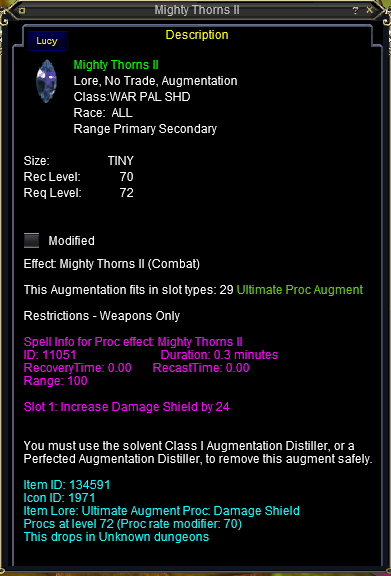
| + | Image:mt2.png|Mighty Thorns II|link={{filepath:mt2.png}} | ||
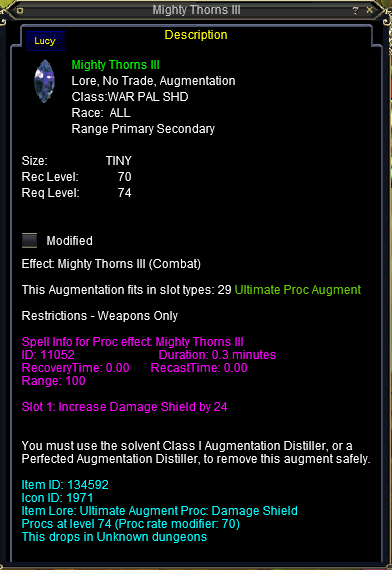
| + | Image:mt3.png|Mighty Thorns III|link={{filepath:mt3.png}} | ||
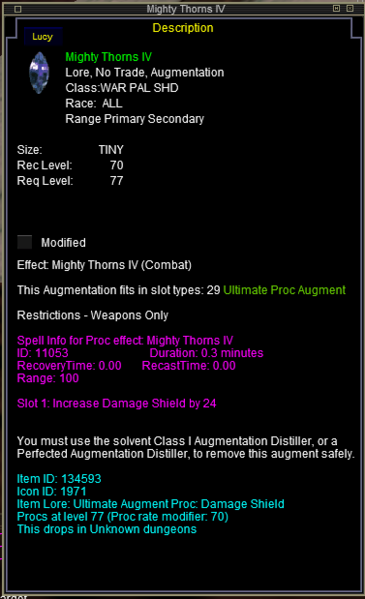
| + | Image:mt4.png|Mighty Thorns IV|link={{filepath:mt4.png}} | ||
| + | </gallery> | ||
| + | <br> | ||
| + | |||
| + | === Amplify Vulnerability === | ||
| + | <gallery mode="packed-hover" widths=420px heights=700px> | ||
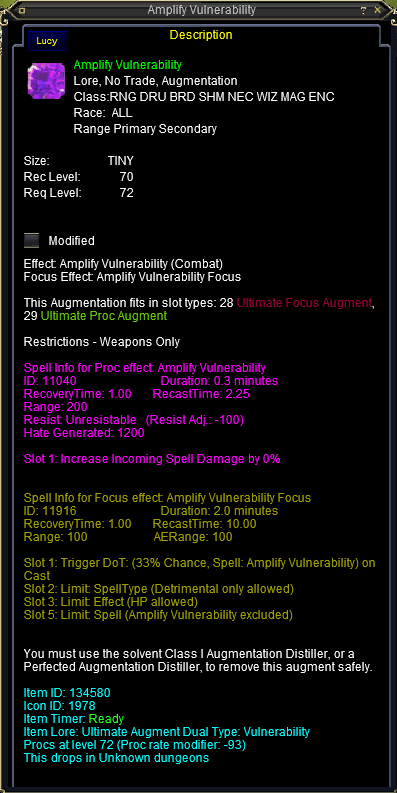
| + | Image:av.png|Amplify Vulnerability|link={{filepath:av.png}} | ||
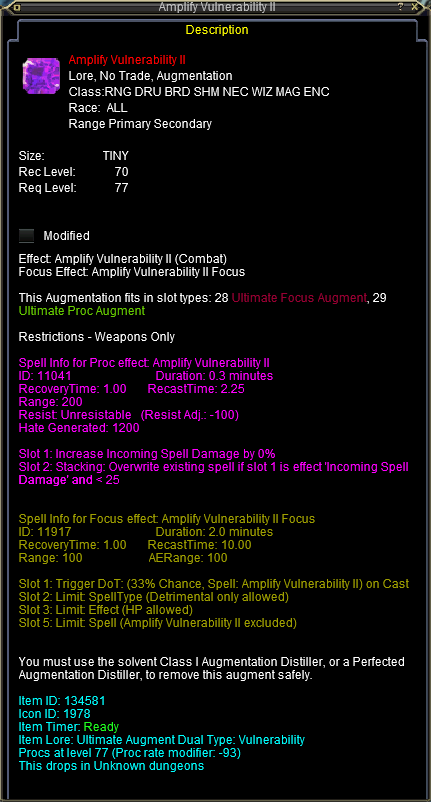
| + | Image:av2.png|Amplify Vulnerability II (Kael)|link={{filepath:av2.png}} | ||
| + | </gallery> | ||
| + | |||
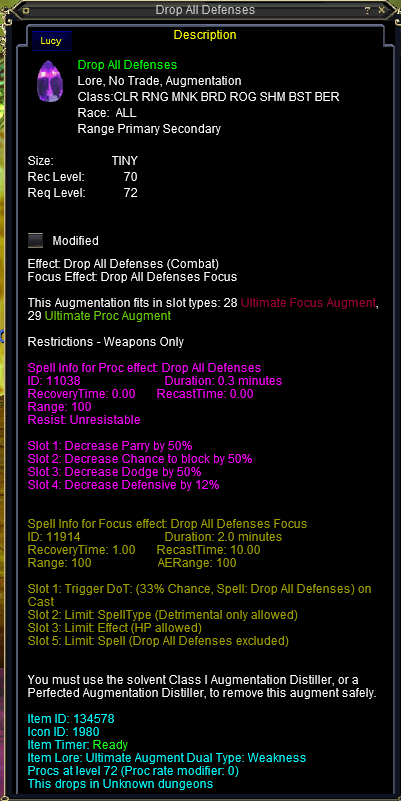
| + | = Non Upgradable Augments = | ||
| + | <gallery mode="packed-hover" widths=420px heights=700px> | ||
| + | Image:dad.png|Drop All Defences|link={{filepath:dad.png}} | ||
| + | Image:id.png|Ignore Death|link={{filepath:id.png}} | ||
| + | </gallery> | ||
| + | |||
| + | __NOTOC__ | ||
| + | [[Category:Augs]] | ||
Latest revision as of 17:11, 22 April 2025
Ultimate Augments are purchased from the Hive Queen in Stonehive, using the Hive Shards alternate currency.
Hive Shards are acquired from the Catacombs of Dranik, Bloodmoon Temple, and Old Blackburrow.
Hatestomp IV, Wide Arc Swing IV, Life from Pain IV and Amplify Vulnerability can be upgraded in Kael Drakkel
Get the armor quest from Gearloose (Rot Vendor)
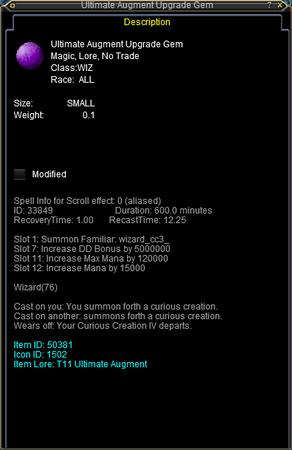
Hand in 20 x armor pattens to receive a Ultimate Augment Upgrade Gem
Augment Upgrade Tokens
Some Ultimate Augments can be upgraded, combine the augment with the correct upgrade token in a magic box.
Rank I Augment + Augment Upgrade Token = Rank II
Rank II Augment + Augment Upgrade Token II = Rank III
Rank III Augment + Augment Upgrade Token III = Rank IV
Kael Drakkel Upgrades
Rank IV Augment + Ultimate Augment Upgrade Gem = Rank V
Amplify Vulnerability + Ultimate Augment Upgrade Gem = Amplify Vulnerability II
Upgradable Augments
Hatestomp
Ultimate Protection
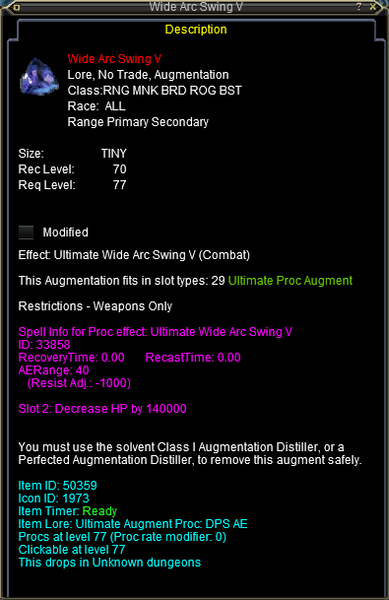
Wide Arc Swing
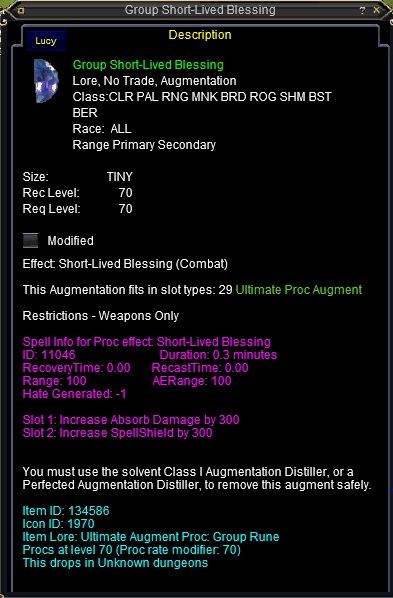
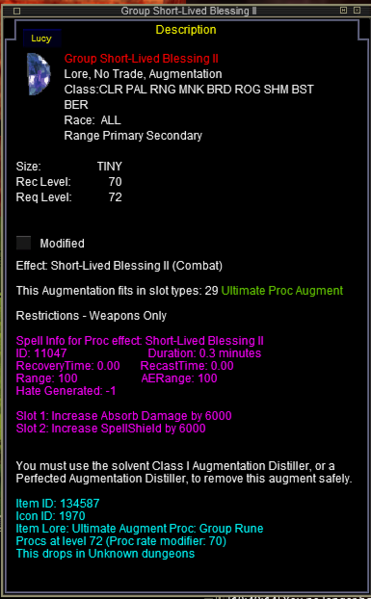
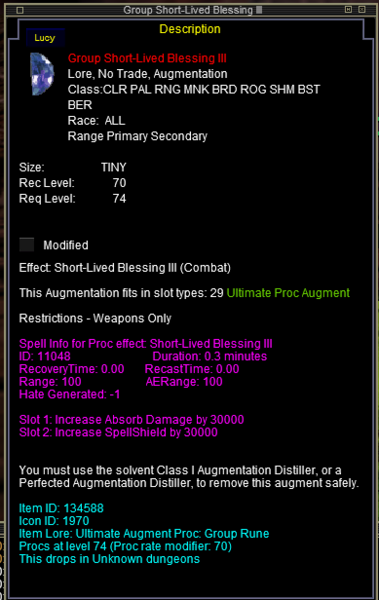
Group Short-Lived Blessing
Life From Pain
Group Chromatic Shield
Mighty Thorns
