Difference between revisions of "Beastlord Armor"
(→Cazic Thule / Arthicrex) |
|||
| (4 intermediate revisions by the same user not shown) | |||
| Line 42: | Line 42: | ||
== T1 - Plane of Dragons == | == T1 - Plane of Dragons == | ||
Click Image(s) for larger image. | Click Image(s) for larger image. | ||
| − | <gallery mode=" | + | <gallery mode="nolines" widths=200px heights=350px> |
| − | Image: | + | Image:T1-Leather-Chest-Mold.png|Ancient Spiked Leather Tunic Pattern|link={{filepath:T1-Leather-Chest-Mold.png}} |
| − | Image: | + | Image:T1-Leather-Legs-Mold.png|Ancient Spiked Leather Pantaloons Pattern|link={{filepath:T1-Leather-Legs-Mold.png}} |
| − | Image: | + | Image:T1-Leather-Helm-Mold.png|Ancient Spiked Leather Skullcap Pattern|link={{filepath:T1-Leather-Helm-Mold.png}} |
| − | Image: | + | Image:T1-Leather-Arms-Mold.png|Ancient Spiked Leather Sleeves Pattern|link={{filepath:T1-Leather-Arms-Mold.png}} |
| − | Image: | + | Image:T1-Leather-Hands-Mold.png|Ancient Spiked Leather Gloves Pattern|link={{filepath:T1-Leather-Hands-Mold.png}} |
| − | Image: | + | Image:T1-Leather-Feet-Mold.png|Ancient Spiked Leather Boots Pattern|link={{filepath:T1-Leather-Feet-Mold.png}} |
| − | Image: | + | Image:T1-Leather-Wrists-Mold.png|Ancient Spiked Leather Wristwraps Pattern|link={{filepath:T1-Leather-Wrists-Mold.png}} |
</gallery> | </gallery> | ||
| + | <gallery mode="nolines" widths=200px heights=350px> | ||
| + | Image:T1-Leather-Chest.png|Ancient Spiked Leather Tunic|link={{filepath:T1-Leather-Chest.png}} | ||
| + | Image:T1-Leather-Legs.png|Ancient Spiked Leather Pantaloons|link={{filepath:T1-Leather-Legs.png}} | ||
| + | Image:T1-Leather-Helm.png|Ancient Spiked Leather Skullcap|link={{filepath:T1-Leather-Helm.png}} | ||
| + | Image:T1-Leather-Arms.png|Ancient Spiked Leather Sleeves|link={{filepath:T1-Leather-Arms.png}} | ||
| + | Image:T1-Leather-Hands.png|Ancient Spiked Leather Gloves|link={{filepath:T1-Leather-Hands.png}} | ||
| + | Image:T1-Leather-Feet.png|Ancient Spiked Leather Boots|link={{filepath:T1-Leather-Feet.png}} | ||
| + | Image:T1-Leather-Wrists.png|Ancient Spiked Leather Wristwraps|link={{filepath:T1-Leather-Wrists.png}} | ||
| + | </gallery> | ||
| + | |||
== T2 - Plane of Dragons == | == T2 - Plane of Dragons == | ||
Click Image(s) for larger image. | Click Image(s) for larger image. | ||
| − | <gallery mode=" | + | <gallery mode="nolines" widths=200px heights=350px> |
| − | Image: | + | Image:T2-Bst-Chest-Mold.png|Frostbloods's Tunic Pattern|link={{filepath:T2-Bst-Chest-Mold.png}} |
| − | Image: | + | Image:T2-Bst-Legs-Mold.png|Frostbloods's Pantaloons Pattern|link={{filepath:T2-Bst-Legs-Mold.png}} |
| − | Image: | + | Image:T2-Bst-Helm-Mold.png|Frostbloods's Skullcap Pattern|link={{filepath:T2-Bst-Helm-Mold.png}} |
| − | Image: | + | Image:T2-Bst-Arms-Mold.png|Frostbloods's Sleeves Pattern|link={{filepath:T2-Bst-Arms-Mold.png}} |
| − | Image: | + | Image:T2-Bst-Hands-Mold.png|Frostbloods's Gloves Pattern|link={{filepath:T2-Bst-Hands-Mold.png}} |
| − | Image: | + | Image:T2-Bst-Feet-Mold.png|Frostbloods's Boots Pattern|link={{filepath:T2-Bst-Feet-Mold.png}} |
| − | Image: | + | Image:T2-Bst-Wrists-Mold.png|Frostbloods's Wristwraps Pattern|link={{filepath:T2-Bst-Wrists-Mold.png}} |
</gallery> | </gallery> | ||
| + | <gallery mode="nolines" widths=200px heights=350px> | ||
| + | Image:T2-Bst-Chest.png|Frostbloods's Tunic|link={{filepath:T2-Bst-Chest.png}} | ||
| + | Image:T2-Bst-Legs.png|Frostbloods's Pantaloons|link={{filepath:T2-Bst-Legs.png}} | ||
| + | Image:T2-Bst-Helm.png|Frostbloods's Skullcap|link={{filepath:T2-Bst-Helm.png}} | ||
| + | Image:T2-Bst-Arms.png|Frostbloods's Sleeves|link={{filepath:T2-Bst-Arms.png}} | ||
| + | Image:T2-Bst-Hands.png|Frostbloods's Gloves|link={{filepath:T2-Bst-Hands.png}} | ||
| + | Image:T2-Bst-Feet.png|Frostbloods's Boots|link={{filepath:T2-Bst-Feet.png}} | ||
| + | Image:T2-Bst-Wrists.png|Frostbloods's Wristwraps|link={{filepath:T2-Bst-Wrists.png}} | ||
| + | </gallery> | ||
| + | |||
== T3 - Airplane == | == T3 - Airplane == | ||
Click Image(s) for larger image. | Click Image(s) for larger image. | ||
| − | <gallery mode=" | + | <gallery mode="nolines" widths=200px heights=350px> |
| − | Image: | + | Image:T3-Leather-Chest-Mold.png|Fennin Ro Tunic Pattern|link={{filepath:T3-Leather-Chest-Mold.png}} |
| − | Image: | + | Image:T3-Leather-Legs-Mold.png|Fennin Ro Pantaloons Pattern|link={{filepath:T3-Leather-Legs-Mold.png}} |
| − | Image: | + | Image:T3-Leather-Helm-Mold.png|Fennin Ro Skullcap Pattern|link={{filepath:T3-Leather-Helm-Mold.png}} |
| − | Image: | + | Image:T3-Leather-Arms-Mold.png|Fennin Ro Sleeves Pattern|link={{filepath:T3-Leather-Arms-Mold.png}} |
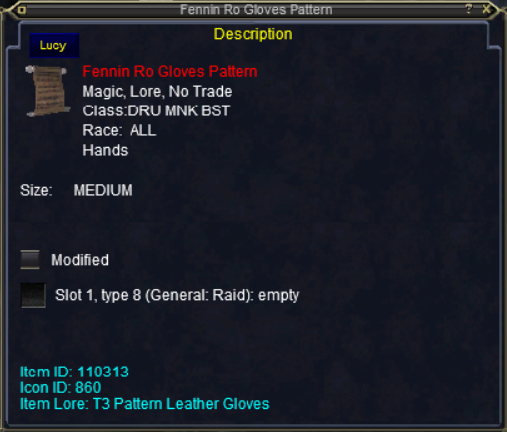
| − | Image: | + | Image:T3-Leather-Hands-Mold.png|Fennin Ro Gloves Pattern|link={{filepath:T3-Leather-Hands-Mold.png}} |
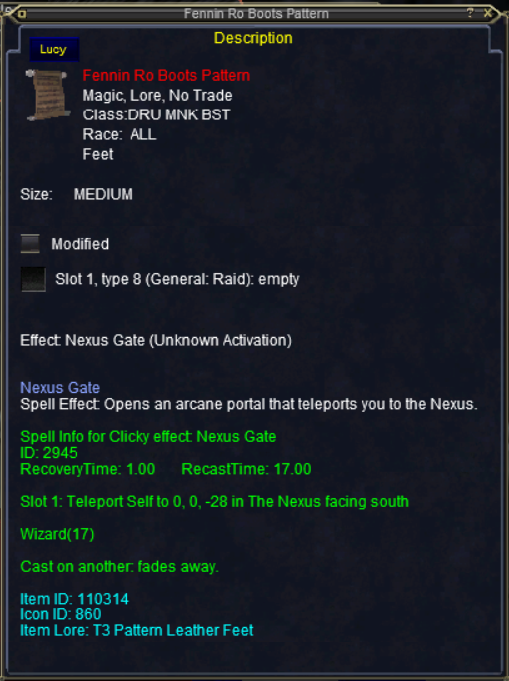
| − | Image: | + | Image:T3-Leather-Feet-Mold.png|Fennin Ro Boots Pattern|link={{filepath:T3-Leather-Feet-Mold.png}} |
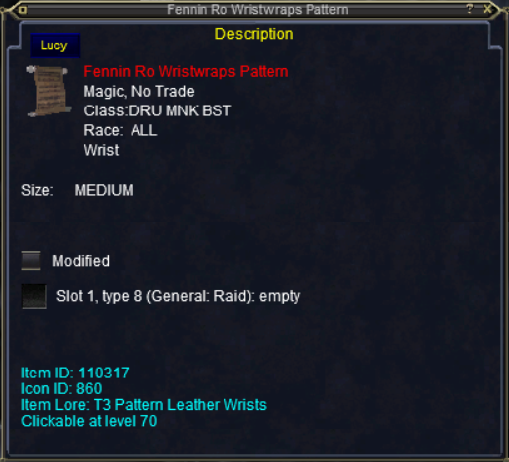
| − | Image: | + | Image:T3-Leather-Wrists-Mold.png|Fennin Ro Wristwraps Pattern|link={{filepath:T3-Leather-Wrists-Mold.png}} |
</gallery> | </gallery> | ||
| + | <gallery mode="nolines" widths=200px heights=350px> | ||
| + | Image:T3-Leather-Chest.png|Fennin Ro Tunic|link={{filepath:T3-Leather-Chest.png}} | ||
| + | Image:T3-Leather-Legs.png|Fennin Ro Pantaloons|link={{filepath:T3-Leather-Legs.png}} | ||
| + | Image:T3-Leather-Helm.png|Fennin Ro Skullcap|link={{filepath:T3-Leather-Helm.png}} | ||
| + | Image:T3-Leather-Arms.png|Fennin Ro Sleeves|link={{filepath:T3-Leather-Arms.png}} | ||
| + | Image:T3-Leather-Hands.png|Fennin Ro Gloves|link={{filepath:T3-Leather-Hands.png}} | ||
| + | Image:T3-Leather-Feet.png|Fennin Ro Boots|link={{filepath:T3-Leather-Feet.png}} | ||
| + | Image:T3-Leather-Wrists.png|Fennin Ro Wristwraps|link={{filepath:T3-Leather-Wrists.png}} | ||
| + | </gallery> | ||
| + | |||
== T4 - Airplane == | == T4 - Airplane == | ||
Click Image(s) for larger image. | Click Image(s) for larger image. | ||
| − | <gallery mode=" | + | <gallery mode="nolines" widths=200px heights=350px> |
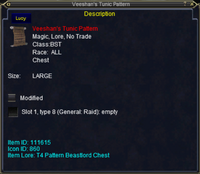
| − | Image: | + | Image:T4-Bst-Chest-Mold.png|Veeshan's Tunic Pattern|link={{filepath:T4-Bst-Chest-Mold.png}} |
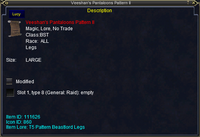
| − | Image: | + | Image:T4-Bst-Legs-Mold.png|Veeshan's Pantaloons Pattern|link={{filepath:T4-Bst-Legs-Mold.png}} |
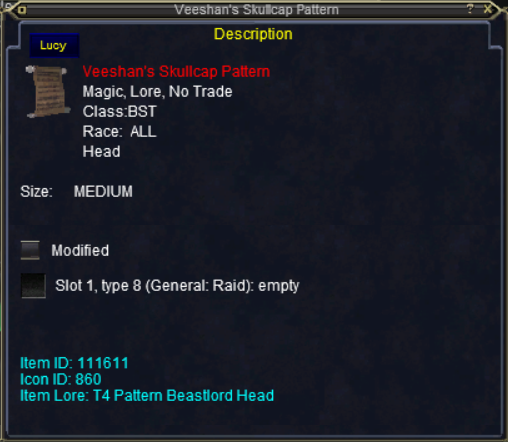
| − | Image: | + | Image:T4-Bst-Helm-Mold.png|Veeshan's Skullcap Pattern|link={{filepath:T4-Bst-Helm-Mold.png}} |
| − | Image: | + | Image:T4-Bst-Arms-Mold.png|Veeshan's Sleeves Pattern|link={{filepath:T4-Bst-Arms-Mold.png}} |
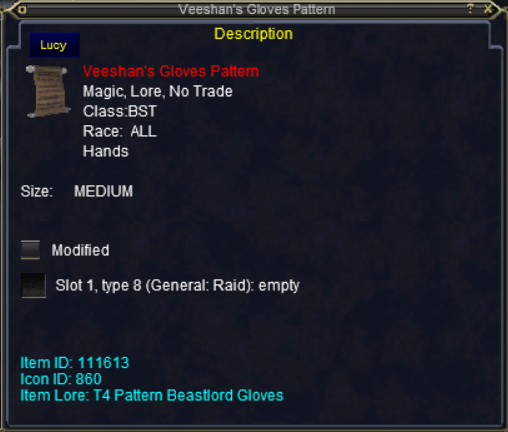
| − | Image: | + | Image:T4-Bst-Hands-Mold.png|Veeshan's Gloves Pattern|link={{filepath:T4-Bst-Hands-Mold.png}} |
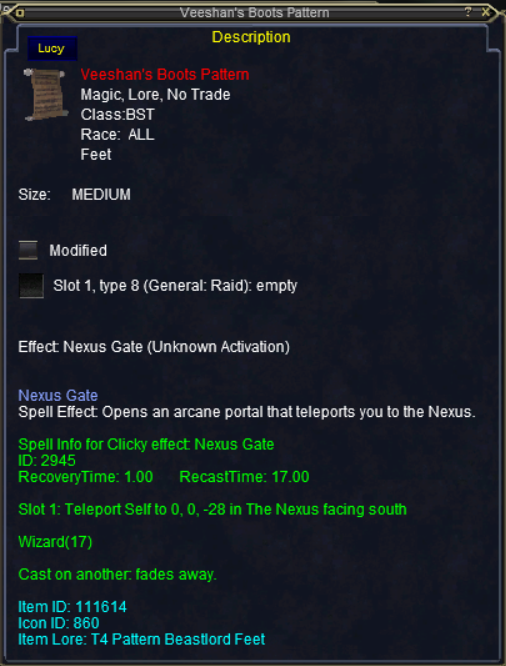
| − | Image: | + | Image:T4-Bst-Feet-Mold.png|Veeshan's Boots Pattern|link={{filepath:T4-Bst-Feet-Mold.png}} |
| − | Image: | + | Image:T4-Bst-Wrists-Mold.png|Veeshan's Wristwraps Pattern|link={{filepath:T4-Bst-Wrists-Mold.png}} |
</gallery> | </gallery> | ||
| + | <gallery mode="nolines" widths=200px heights=350px> | ||
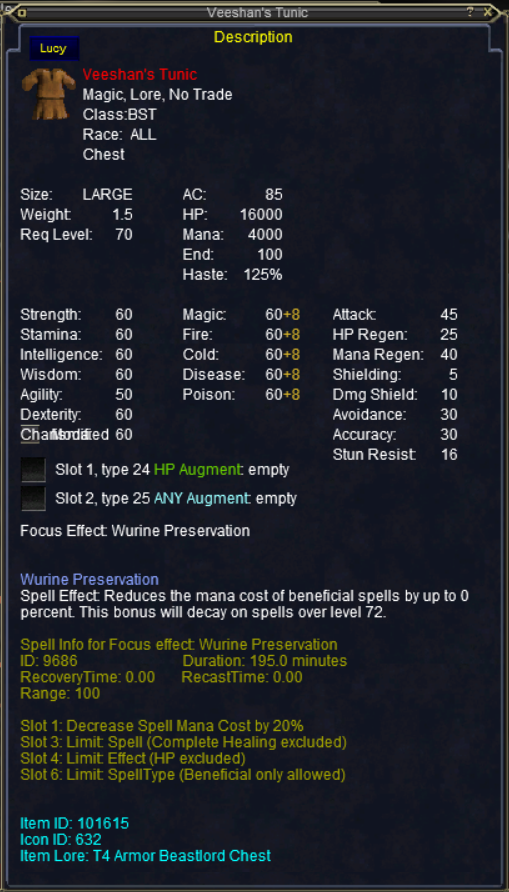
| + | Image:T4-Bst-Chest.png|Veeshan's Tunic|link={{filepath:T4-Bst-Chest.png}} | ||
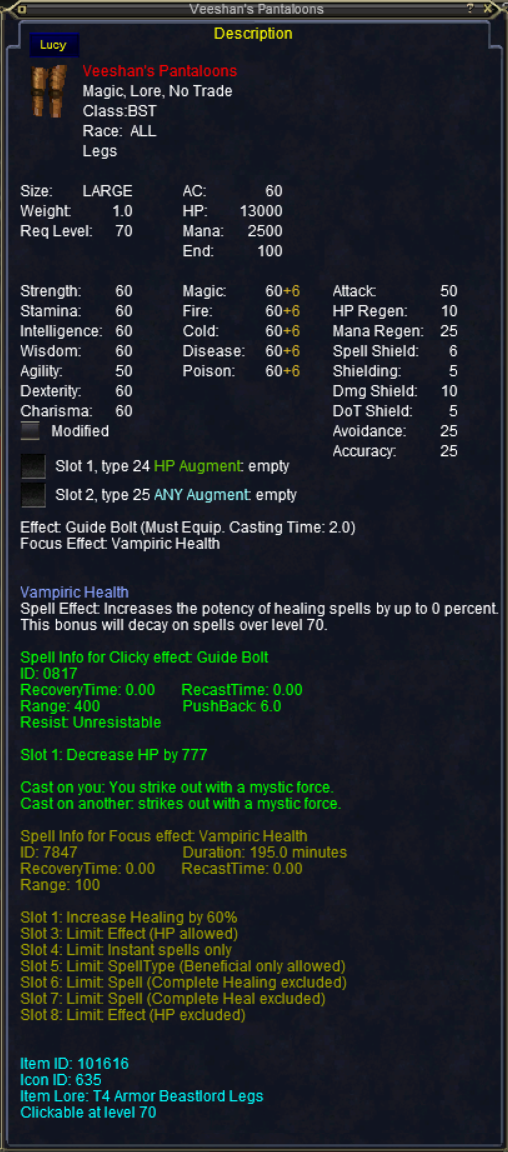
| + | Image:T4-Bst-Legs.png|Veeshan's Pantaloons|link={{filepath:T4-Bst-Legs.png}} | ||
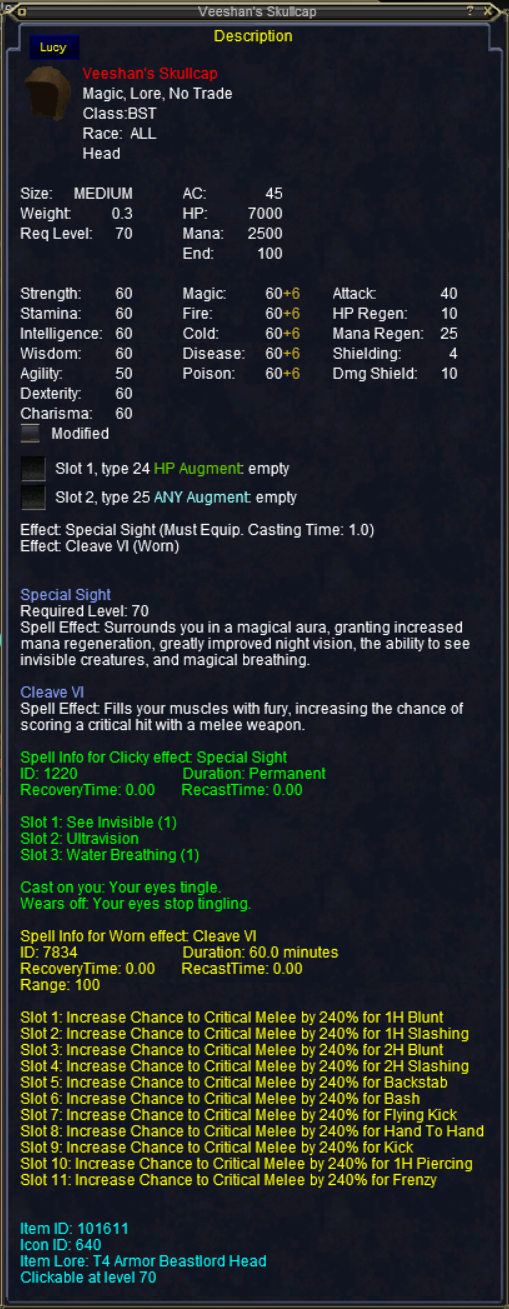
| + | Image:T4-Bst-Helm.png|Veeshan's Skullcap|link={{filepath:T4-Bst-Helm.png}} | ||
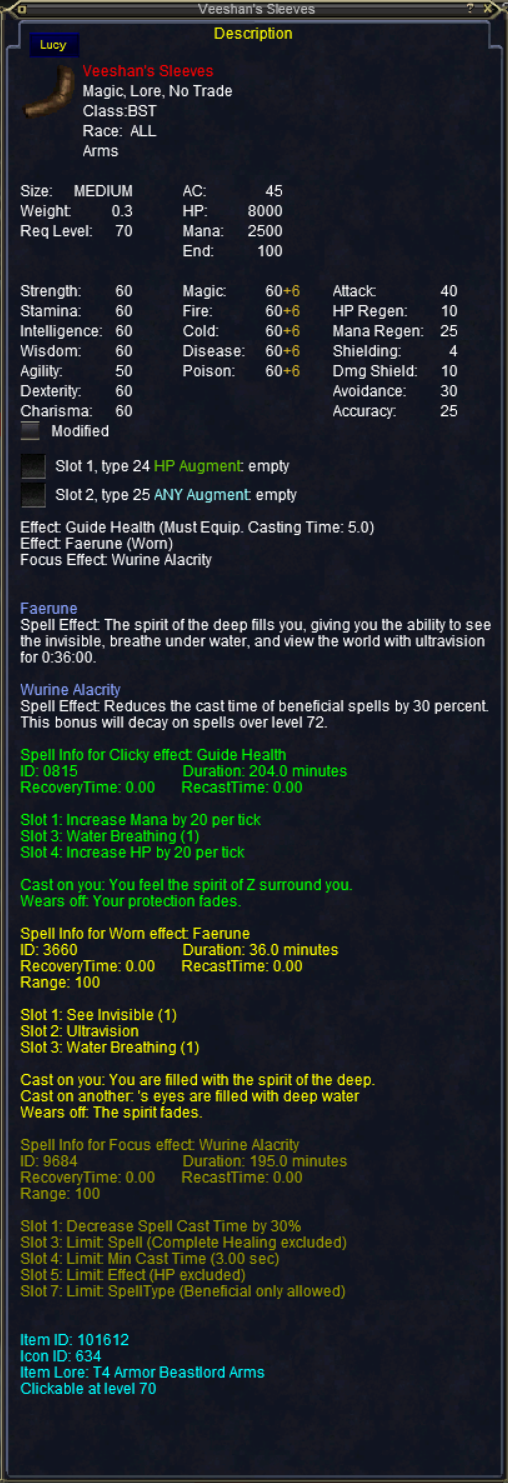
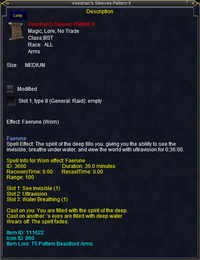
| + | Image:T4-Bst-Arms.png|Veeshan's Sleeves|link={{filepath:T4-Bst-Arms.png}} | ||
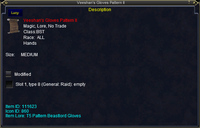
| + | Image:T4-Bst-Hands.png|Veeshan's Gloves|link={{filepath:T4-Bst-Hands.png}} | ||
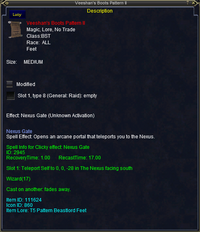
| + | Image:T4-Bst-Feet.png|Veeshan's Boots|link={{filepath:T4-Bst-Feet.png}} | ||
| + | Image:T4-Bst-Wrists.png|Veeshan's Wristwraps|link={{filepath:T4-Bst-Wrists.png}} | ||
| + | </gallery> | ||
| + | |||
== T5 - Abyss == | == T5 - Abyss == | ||
Click Image(s) for larger image. | Click Image(s) for larger image. | ||
| − | <gallery mode=" | + | <gallery mode="nolines" widths=200px heights=350px> |
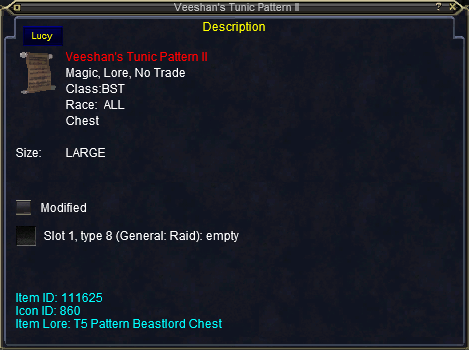
| − | Image: | + | Image:T5-Bst-Chest-Mold.png|Veeshan's Tunic Pattern II|link={{filepath:T5-Bst-Chest-Mold.png}} |
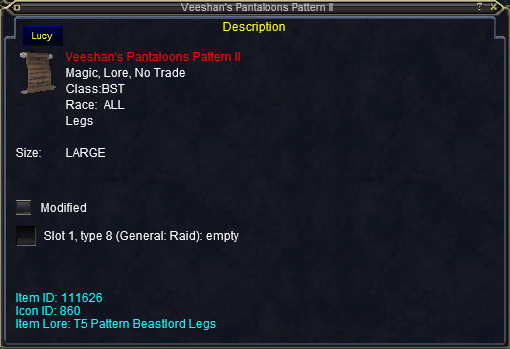
| − | Image: | + | Image:T5-Bst-Legs-Mold.png|Veeshan's Pantaloons Pattern II|link={{filepath:T5-Bst-Legs-Mold.png}} |
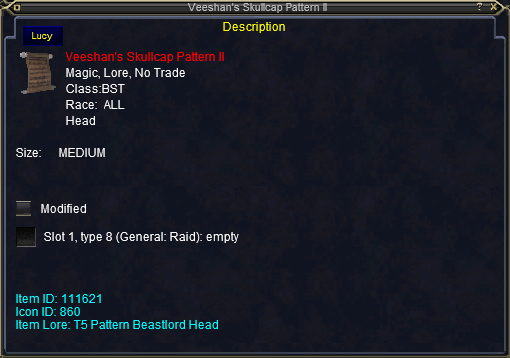
| − | Image: | + | Image:T5-Bst-Helm-Mold.png|Veeshan's Skullcap Pattern II|link={{filepath:T5-Bst-Helm-Mold.png}} |
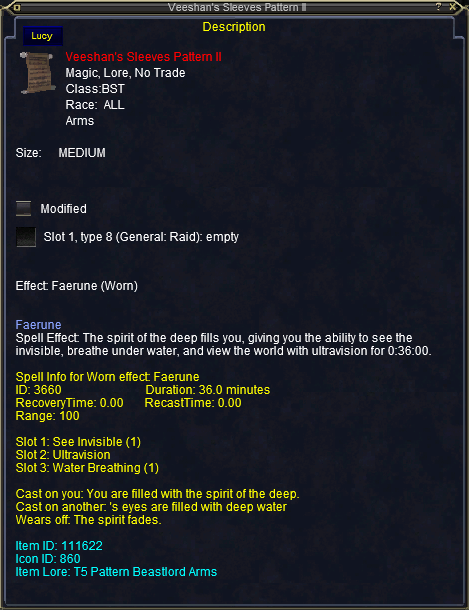
| − | Image: | + | Image:T5-Bst-Arms-Mold.png|Veeshan's Sleeves Pattern II|link={{filepath:T5-Bst-Arms-Mold.png}} |
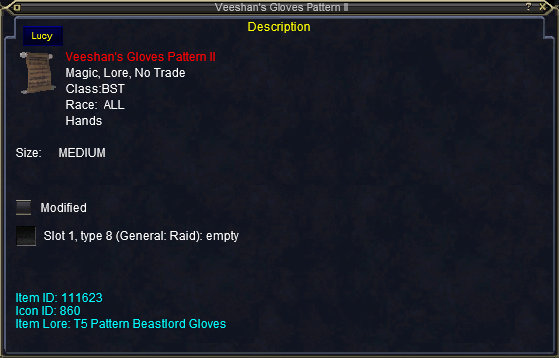
| − | Image: | + | Image:T5-Bst-Hands-Mold.png|Veeshan's Gloves Pattern II|link={{filepath:T5-Bst-Hands-Mold.png}} |
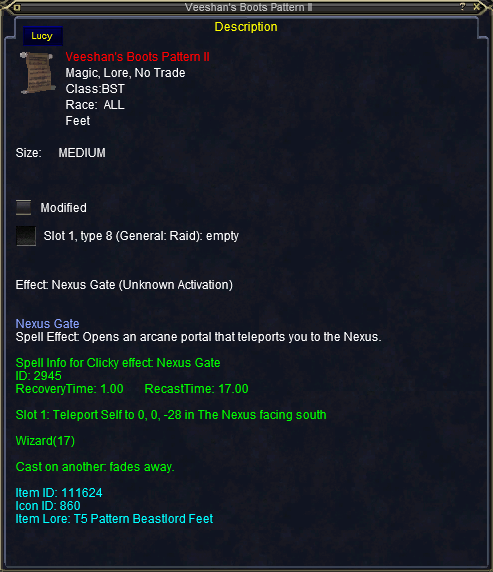
| − | Image: | + | Image:T5-Bst-Feet-Mold.png|Veeshan's Boots Pattern II|link={{filepath:T5-Bst-Feet-Mold.png}} |
| − | Image: | + | Image:T5-Bst-Wrists-Mold.png|Veeshan's Wristwraps Pattern II|link={{filepath:T5-Bst-Wrists-Mold.png}} |
</gallery> | </gallery> | ||
| + | <gallery mode="nolines" widths=200px heights=350px> | ||
| + | Image:T5-Bst-Chest.png|Veeshan's Tunic II|link={{filepath:T5-Bst-Chest.png}} | ||
| + | Image:T5-Bst-Legs.png|Veeshan's Pantaloons II|link={{filepath:T5-Bst-Legs.png}} | ||
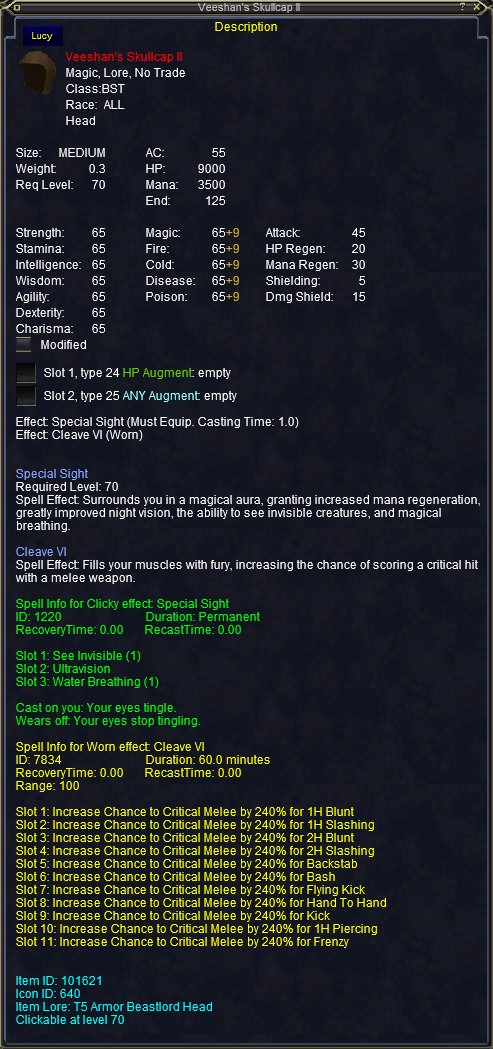
| + | Image:T5-Bst-Helm.png|Veeshan's Skullcap II|link={{filepath:T5-Bst-Helm.png}} | ||
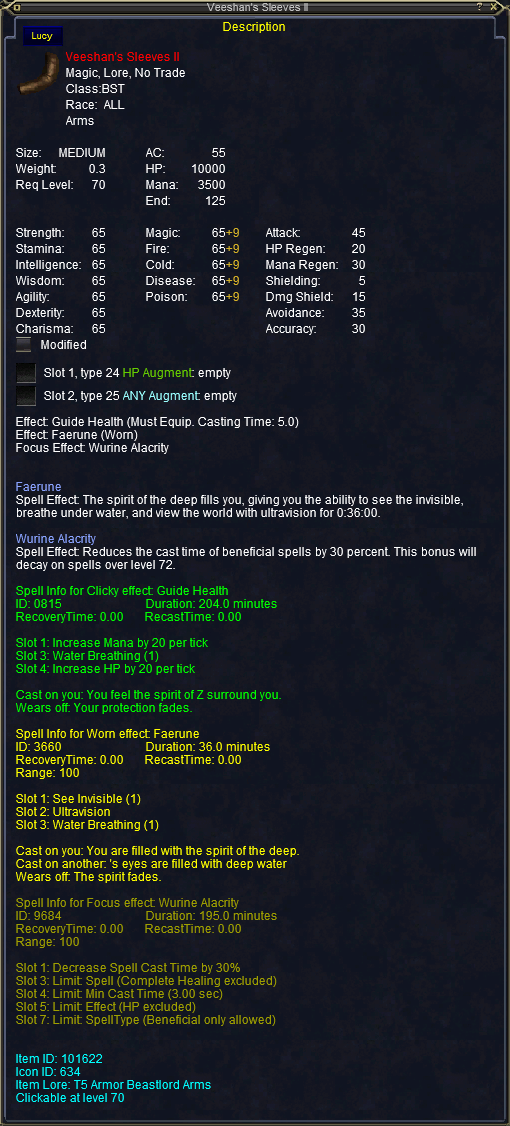
| + | Image:T5-Bst-Arms.png|Veeshan's Sleeves II|link={{filepath:T5-Bst-Arms.png}} | ||
| + | Image:T5-Bst-Hands.png|Veeshan's Gloves II|link={{filepath:T5-Bst-Hands.png}} | ||
| + | Image:T5-Bst-Feet.png|Veeshan's Boots II|link={{filepath:T5-Bst-Feet.png}} | ||
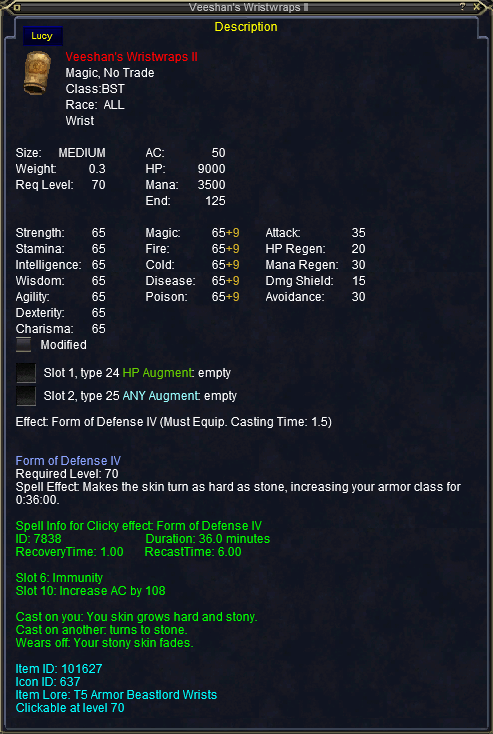
| + | Image:T5-Bst-Wrists.png|Veeshan's Wristwraps II|link={{filepath:T5-Bst-Wrists.png}} | ||
| + | </gallery> | ||
| + | |||
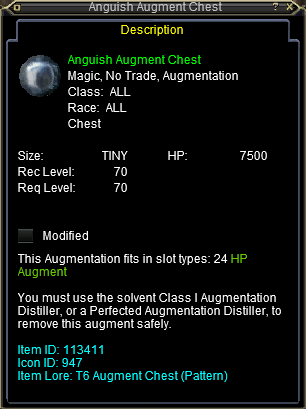
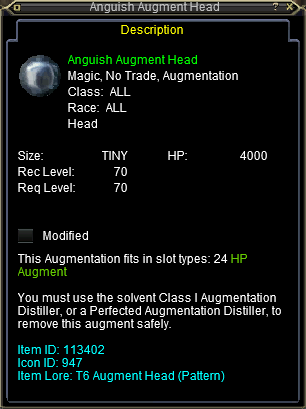
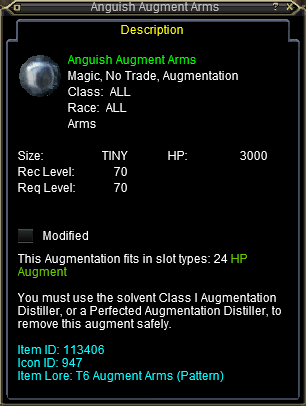
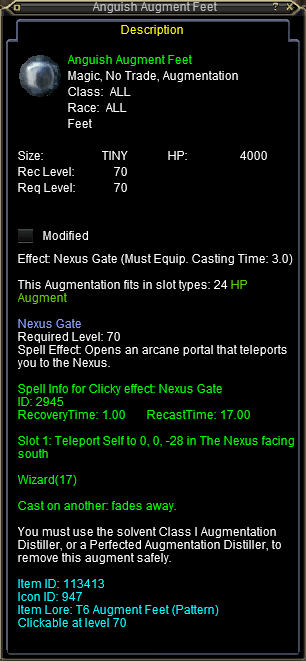
== T6 - Anguish == | == T6 - Anguish == | ||
Click Image(s) for larger image. | Click Image(s) for larger image. | ||
| − | <gallery mode=" | + | <gallery mode="nolines" widths=200px heights=350px> |
| − | Image: | + | Image:T6-Chest-Mold.png|Anguish Augment Chest|link={{filepath:T6-Chest-Mold.png}} |
| − | Image: | + | Image:T6-Legs-Mold.png|Anguish Augment Legs|link={{filepath:T6-Legs-Mold.png}} |
| − | Image: | + | Image:T6-Helm-Mold.png|Anguish Augment Head|link={{filepath:T6-Helm-Mold.png}} |
| − | Image: | + | Image:T6-Arms-Mold.png|Anguish Augment Arms|link={{filepath:T6-Arms-Mold.png}} |
| − | Image: | + | Image:T6-Hands-Mold.png|Anguish Augment Hands|link={{filepath:T6-Hands-Mold.png}} |
| − | Image: | + | Image:T6-Feet-Mold.png|Anguish Augment Feet|link={{filepath:T6-Feet-Mold.png}} |
| − | Image: | + | Image:T6-Wrists-Mold.png|Anguish Augment Wrist|link={{filepath:T6-Wrists-Mold.png}} |
</gallery> | </gallery> | ||
| + | <gallery mode="nolines" widths=200px heights=350px> | ||
| + | Image:T6-Bst-Chest.png|Veeshan's Tunic III|link={{filepath:T6-Bst-Chest.png}} | ||
| + | Image:T6-Bst-Legs.png|Veeshan's Pantaloons III|link={{filepath:T6-Bst-Legs.png}} | ||
| + | Image:T6-Bst-Helm.png|Veeshan's Skullcap III|link={{filepath:T6-Bst-Helm.png}} | ||
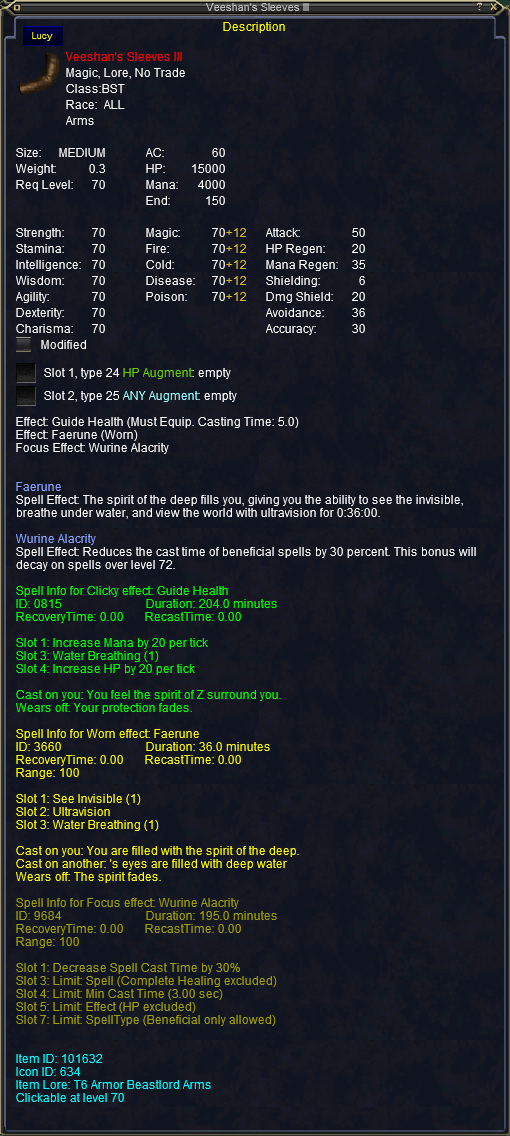
| + | Image:T6-Bst-Arms.png|Veeshan's Sleeves III|link={{filepath:T6-Bst-Arms.png}} | ||
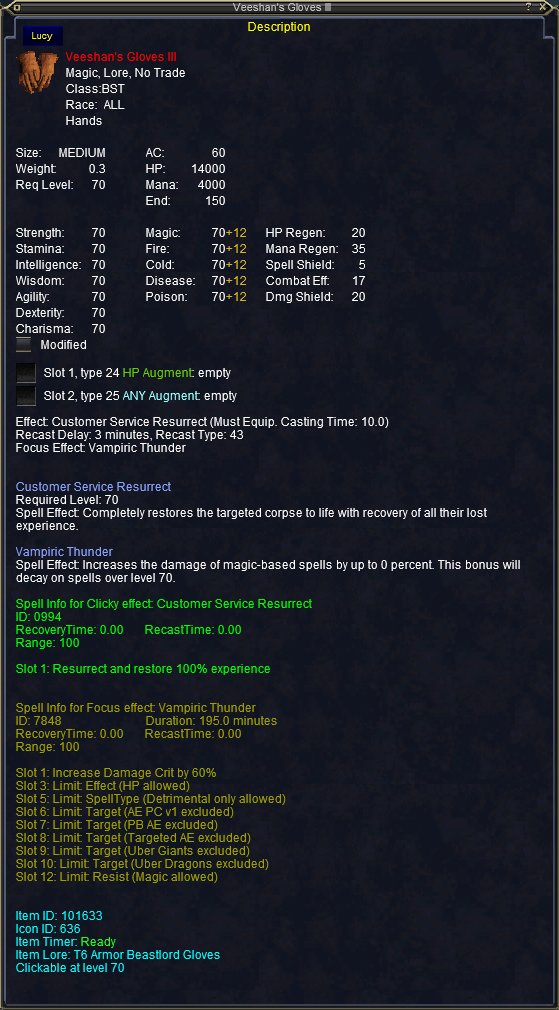
| + | Image:T6-Bst-Hands.png|Veeshan's Gloves III|link={{filepath:T6-Bst-Hands.png}} | ||
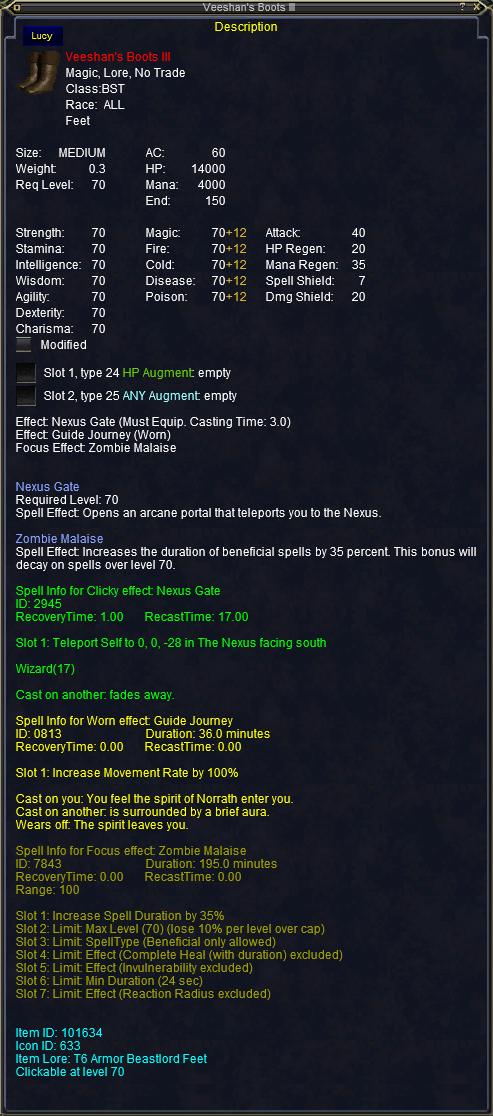
| + | Image:T6-Bst-Feet.png|Veeshan's Boots III|link={{filepath:T6-Bst-Feet.png}} | ||
| + | Image:T6-Bst-Wrists.png|Veeshan's Wristwraps III|link={{filepath:T6-Bst-Wrists.png}} | ||
| + | </gallery> | ||
| + | |||
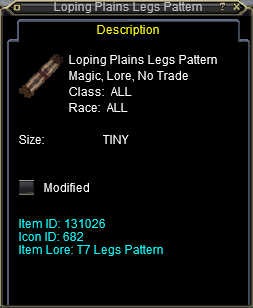
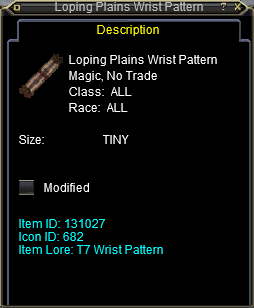
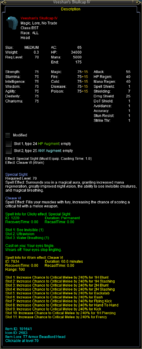
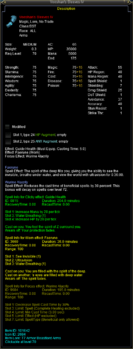
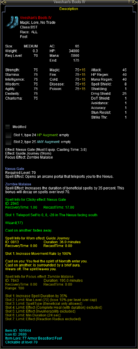
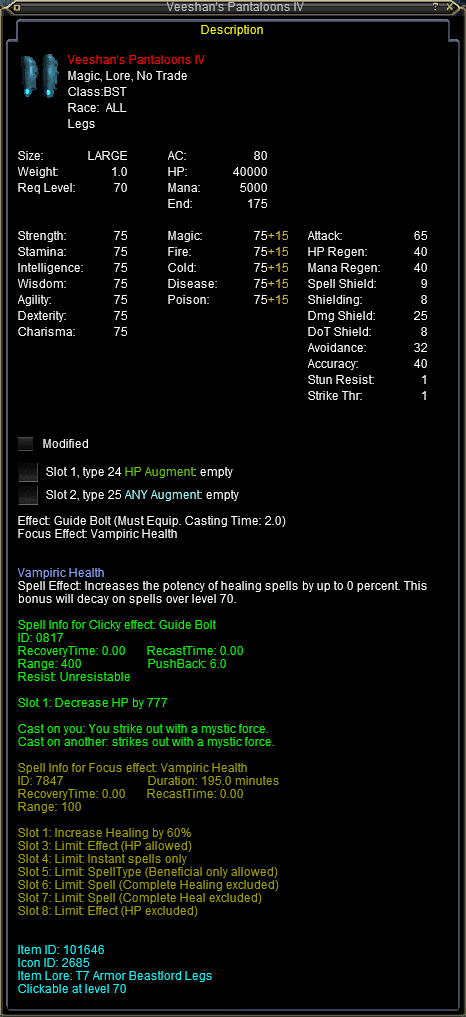
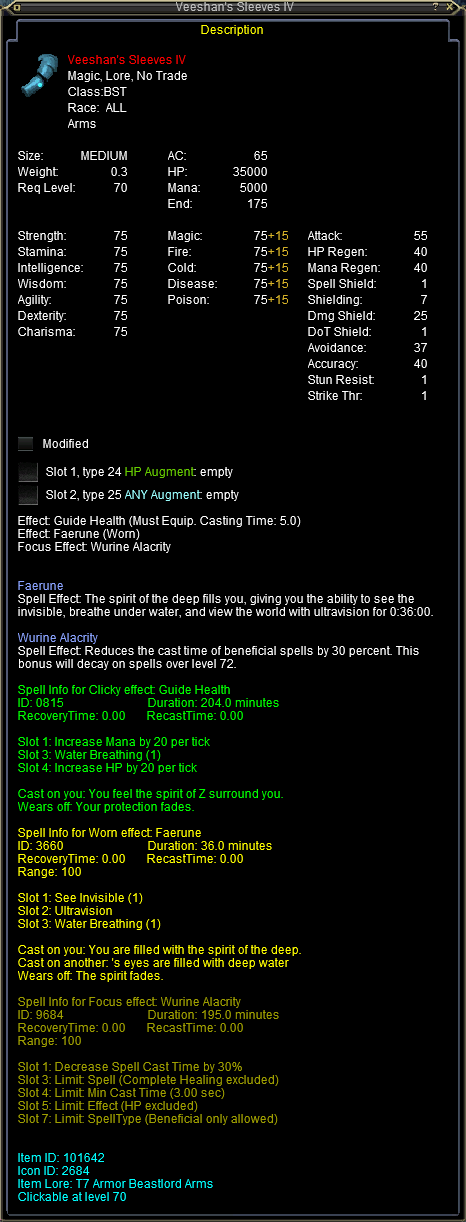
== T7 - Loping Plains == | == T7 - Loping Plains == | ||
Click Image(s) for larger image. | Click Image(s) for larger image. | ||
| − | <gallery mode=" | + | <gallery mode="nolines" widths=200px heights=350px> |
| − | Image: | + | Image:T7-Chest-Mold.png|Loping Plains Chest Pattern|link={{filepath:T7-Chest-Mold.png}} |
| − | Image: | + | Image:T7-Legs-Mold.png|Loping Plains Legs Pattern|link={{filepath:T7-Legs-Mold.png}} |
| − | Image: | + | Image:T7-Helm-Mold.png|Loping Plains Head Pattern|link={{filepath:T7-Helm-Mold.png}} |
| − | Image: | + | Image:T7-Arms-Mold.png|Loping Plains Arms Pattern|link={{filepath:T7-Arms-Mold.png}} |
| − | Image: | + | Image:T7-Hands-Mold.png|Loping Plains Gloves Pattern|link={{filepath:T7-Hands-Mold.png}} |
| − | Image: | + | Image:T7-Feet-Mold.png|Loping Plains Feet Pattern|link={{filepath:T7-Feet-Mold.png}} |
| − | Image: | + | Image:T7-Wrists-Mold.png|Loping Plains Wrist Pattern|link={{filepath:T7-Wrists-Mold.png}} |
</gallery> | </gallery> | ||
| + | <gallery mode="nolines" widths=200px heights=350px> | ||
| + | Image:T7-Bst-Chest.png|Veeshan's Tunic IV|link={{filepath:T7-Bst-Chest.png}} | ||
| + | Image:T7-Bst-Legs.png|Veeshan's Pantaloons IV|link={{filepath:T7-Bst-Legs.png}} | ||
| + | Image:T7-Bst-Helm.png|Veeshan's Skullcap IV|link={{filepath:T7-Bst-Helm.png}} | ||
| + | Image:T7-Bst-Arms.png|Veeshan's Sleeves IV|link={{filepath:T7-Bst-Arms.png}} | ||
| + | Image:T7-Bst-Hands.png|Veeshan's Gloves IV|link={{filepath:T7-Bst-Hands.png}} | ||
| + | Image:T7-Bst-Feet.png|Veeshan's Boots IV|link={{filepath:T7-Bst-Feet.png}} | ||
| + | Image:T7-Bst-Wrists.png|Veeshan's Wristwraps IV|link={{filepath:T7-Bst-Wrists.png}} | ||
| + | </gallery> | ||
| + | |||
== T8 - Temple Veeshan == | == T8 - Temple Veeshan == | ||
Click Image(s) for larger image. | Click Image(s) for larger image. | ||
| − | <gallery mode=" | + | <gallery mode="nolines" widths=200px heights=350px> |
| − | Image: | + | Image:T8-Bst-Chest.png|Khmer's Tunic|link={{filepath:T8-Bst-Chest.png}} |
| − | Image: | + | Image:T8-Bst-Legs.png|Khmer's Pantaloons|link={{filepath:T8-Bst-Legs.png}} |
| − | Image: | + | Image:T8-Bst-Helm.png|Khmer's Skullcap|link={{filepath:T8-Bst-Helm.png}} |
| − | Image: | + | Image:T8-Bst-Arms.png|Khmer's Sleeves|link={{filepath:T8-Bst-Arms.png}} |
| − | Image: | + | Image:T8-Bst-Hands.png|Khmer's Gloves|link={{filepath:T8-Bst-Hands.png}} |
| − | Image: | + | Image:T8-Bst-Feet.png|Khmer's Boots|link={{filepath:T8-Bst-Feet.png}} |
| − | Image: | + | Image:T8-Bst-Wrists.png|Khmer's Wristwraps|link={{filepath:T8-Bst-Wrists.png}} |
</gallery> | </gallery> | ||
| + | |||
== T9 - Old Commons == | == T9 - Old Commons == | ||
Click Image(s) for larger image. | Click Image(s) for larger image. | ||
| − | <gallery mode=" | + | <gallery mode="nolines" widths=200px heights=350px> |
| − | Image: | + | Image:T9-Bst-Chest.png|Hard Leather Tunic of the Piranha|link={{filepath:T9-Bst-Chest.png}} |
| − | Image: | + | Image:T9-Bst-Legs.png|Hard Leather Pantaloons of the Piranha|link={{filepath:T9-Bst-Legs.png}} |
| − | Image: | + | Image:T9-Bst-Helm.png|Hard Leather Skullcap of the Piranha|link={{filepath:T9-Bst-Helm.png}} |
| − | Image: | + | Image:T9-Bst-Arms.png|Hard Leather Sleeves of the Piranha|link={{filepath:T9-Bst-Arms.png}} |
| − | Image: | + | Image:T9-Bst-Hands.png|Hard Leather Gloves of the Piranha|link={{filepath:T9-Bst-Hands.png}} |
| − | Image: | + | Image:T9-Bst-Feet.png|Hard Leather Boots of the Piranha|link={{filepath:T9-Bst-Feet.png}} |
| − | Image: | + | Image:T9-Bst-Wrists.png|Hard Leather Wristwraps of the Piranha|link={{filepath:T9-Bst-Wrists.png}} |
</gallery> | </gallery> | ||
| + | |||
== T10 - Sunderock - Orc == | == T10 - Sunderock - Orc == | ||
Click Image(s) for larger image. | Click Image(s) for larger image. | ||
| Line 162: | Line 234: | ||
Image:T10-Gnoll-Leather-Wrists.png|T10 Gnoll Leather Wrists<br>Wristwraps of the Shifty Brawler|link={{filepath:T10-Gnoll-Leather-Wrists.png}} | Image:T10-Gnoll-Leather-Wrists.png|T10 Gnoll Leather Wrists<br>Wristwraps of the Shifty Brawler|link={{filepath:T10-Gnoll-Leather-Wrists.png}} | ||
</gallery> | </gallery> | ||
| + | |||
== T10 - Sunderock - Sarnak == | == T10 - Sunderock - Sarnak == | ||
Click Image(s) for larger image. | Click Image(s) for larger image. | ||
Latest revision as of 04:24, 3 December 2024
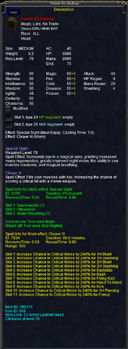
QVIC
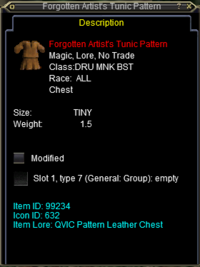
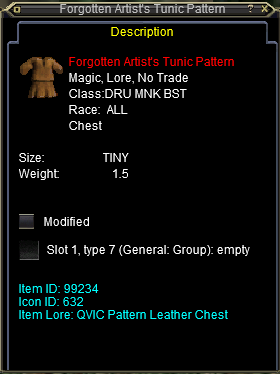
Forgotten Artist's Tunic Pattern
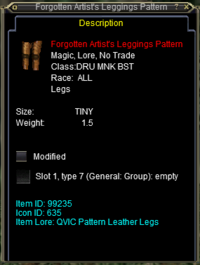
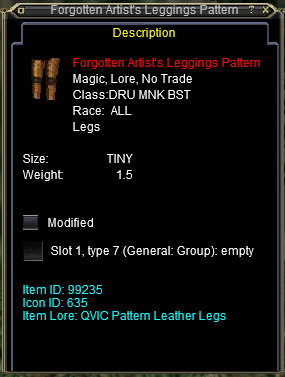
Forgotten Artist's Leggings Pattern

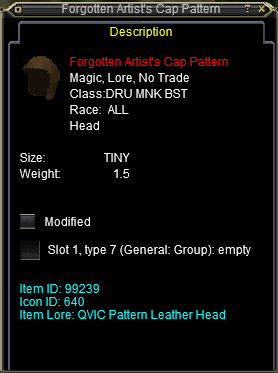
Forgotten Artist's Cap Pattern
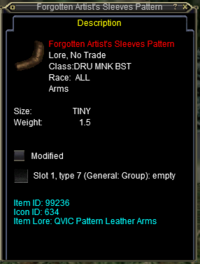
Forgotten Artist's Sleeves Pattern
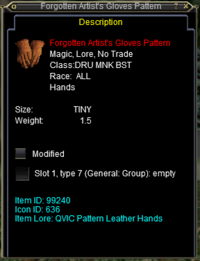
Forgotten Artist's Gloves Pattern

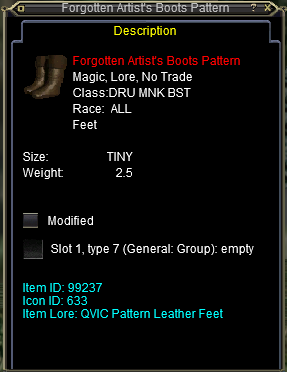
Forgotten Artist's Boots Pattern
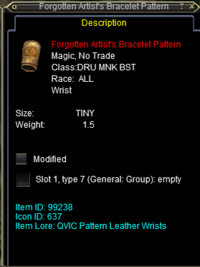
Forgotten Artist's Bracelet Pattern


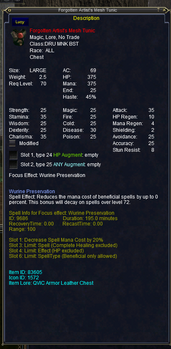
Forgotten Artist's Mesh Tunic
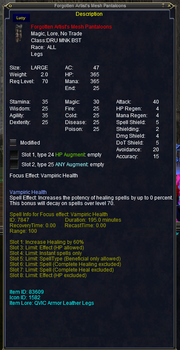
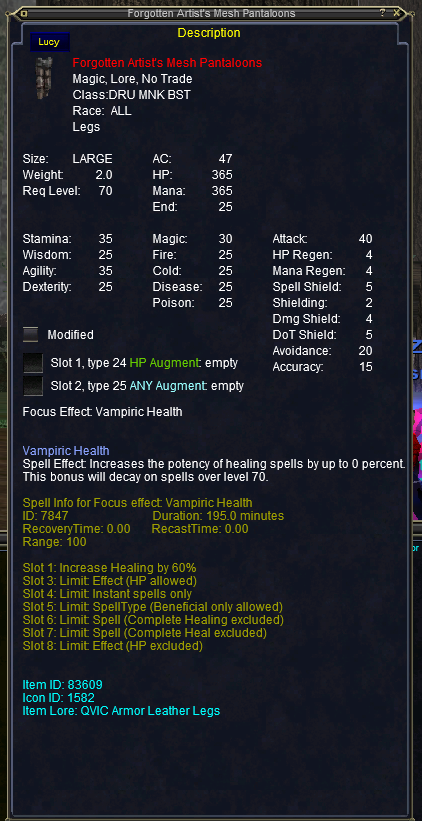
Forgotten Artist's Mesh Pantaloons
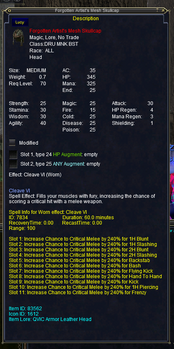
Forgotten Artist's Mesh Skullcap

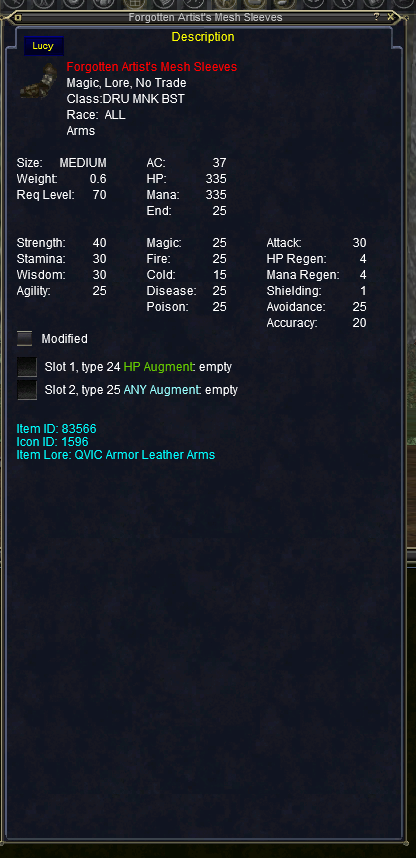
Forgotten Artist's Mesh Sleeves

Forgotten Artist's Mesh Gloves
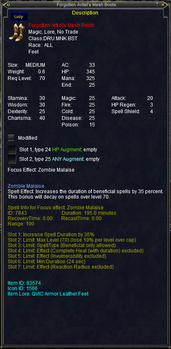
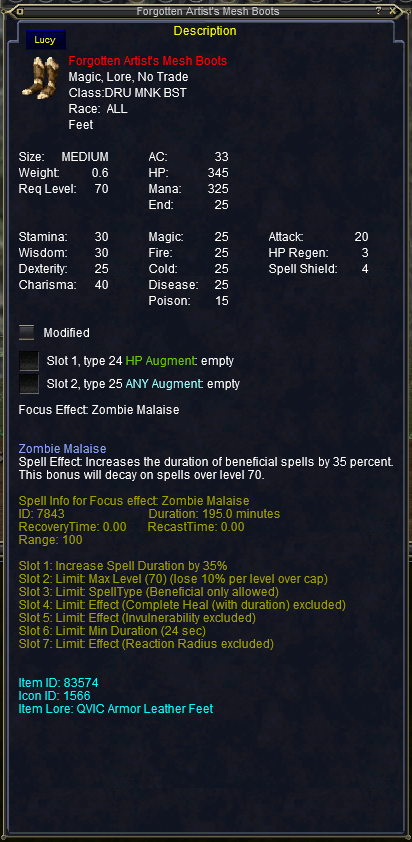
Forgotten Artist's Mesh Boots
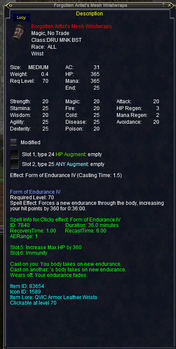
Forgotten Artist's Mesh Wristwraps


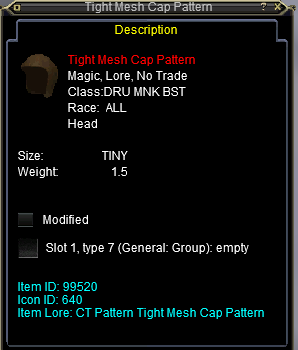
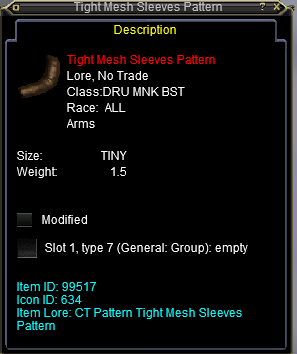
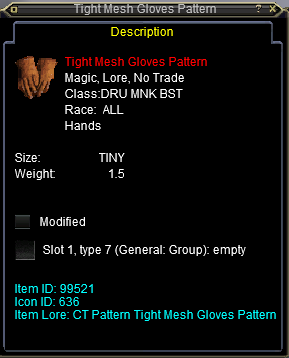
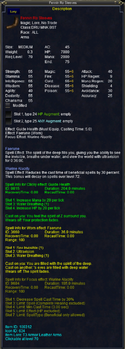
Cazic Thule / Arthicrex
Click Image(s) for larger image.
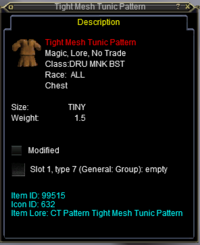
Tight Mesh Tunic Pattern
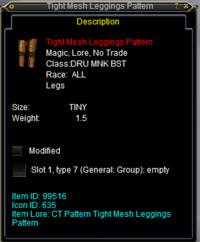
Tight Mesh Leggings Pattern
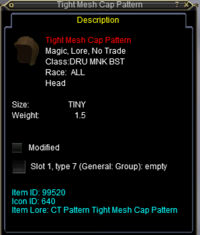
Tight Mesh Cap Pattern
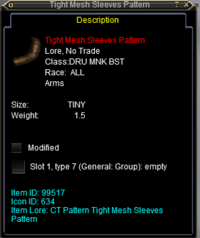
Tight Mesh Sleeves Pattern

Tight Mesh Gloves Pattern
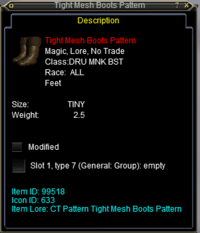
Tight Mesh Boots Pattern
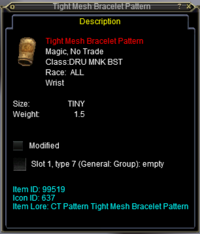
Tight Mesh Bracelet Pattern


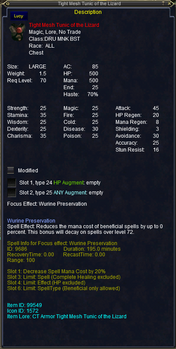
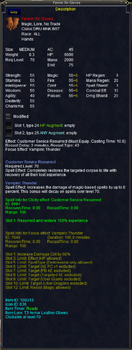
Tight Mesh Tunic of the Lizard
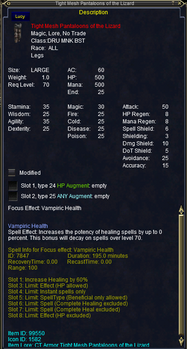
Tight Mesh Pantaloons of the Lizard
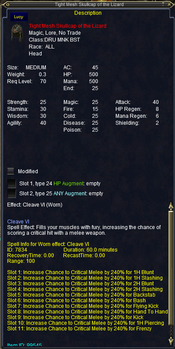
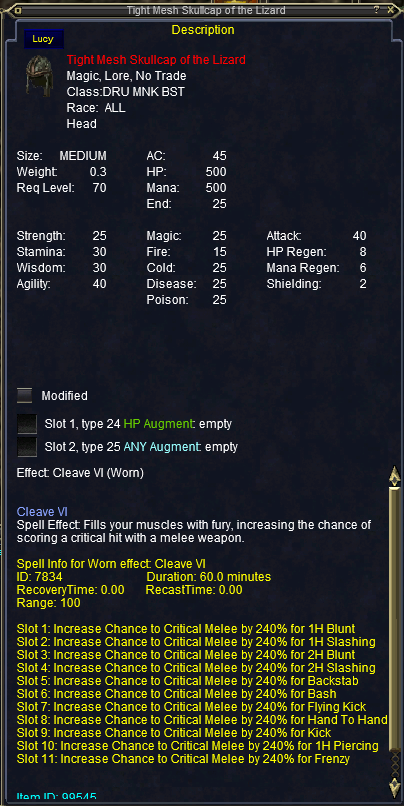
Tight Mesh Skullcap of the Lizard
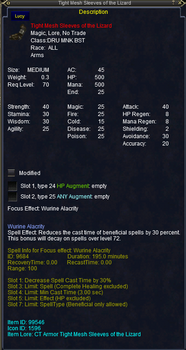
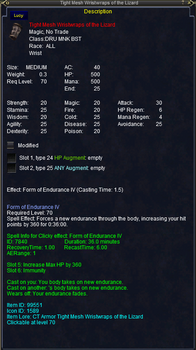
Tight Mesh Sleeves of the Lizard
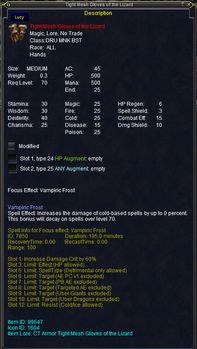
Tight Mesh Gloves of the Lizard
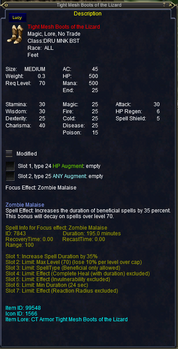
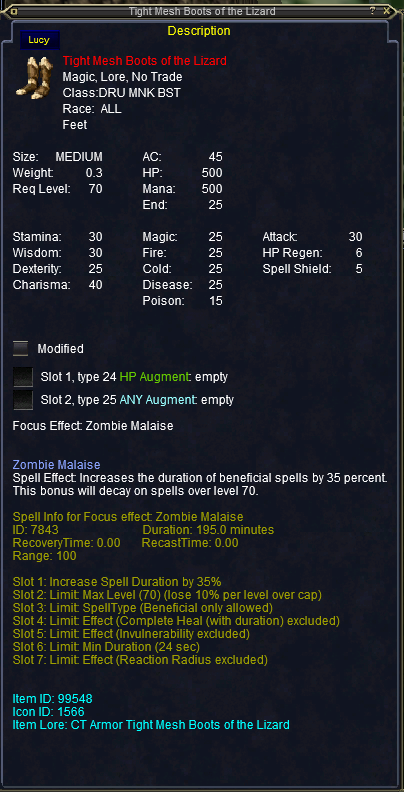
Tight Mesh Boots of the Lizard
Tight Mesh Wristwraps of the Lizard


T1 - Plane of Dragons
Click Image(s) for larger image.
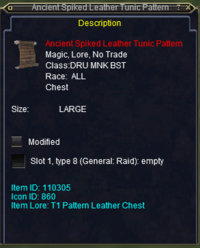
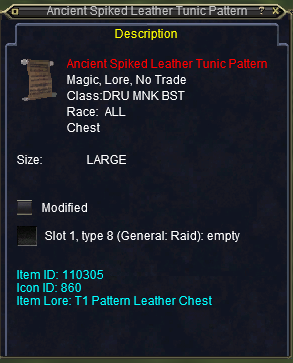
Ancient Spiked Leather Tunic Pattern
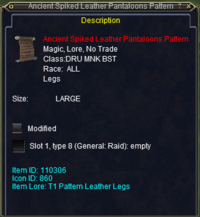
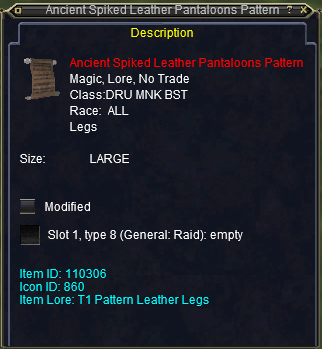
Ancient Spiked Leather Pantaloons Pattern

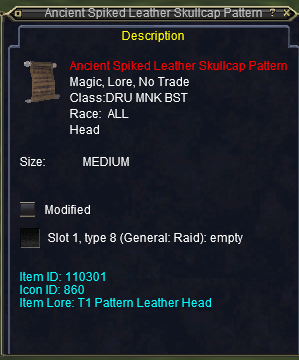
Ancient Spiked Leather Skullcap Pattern
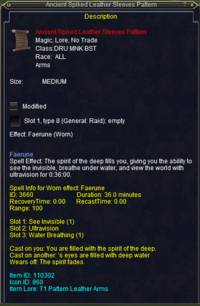
Ancient Spiked Leather Sleeves Pattern
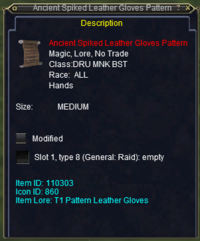
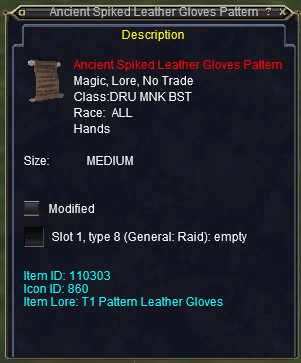
Ancient Spiked Leather Gloves Pattern
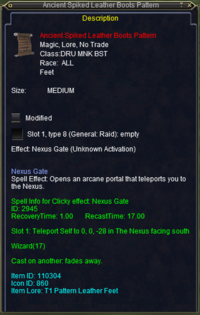
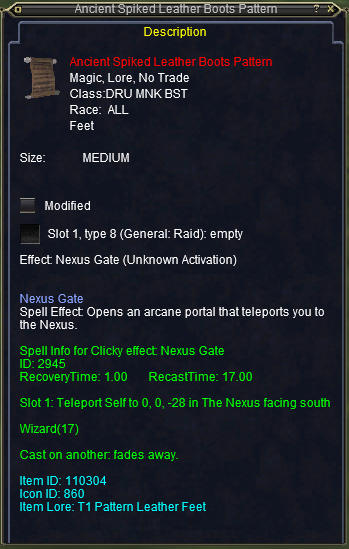
Ancient Spiked Leather Boots Pattern
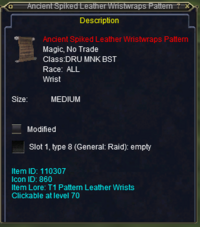
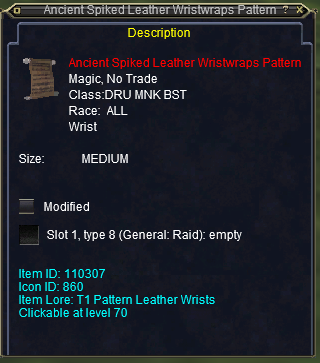
Ancient Spiked Leather Wristwraps Pattern

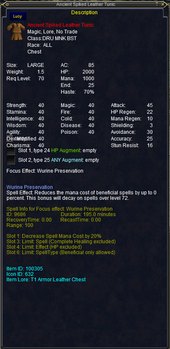
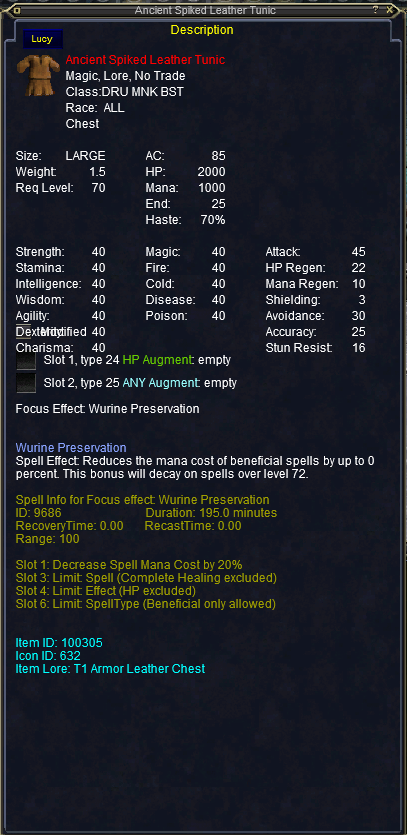
Ancient Spiked Leather Tunic

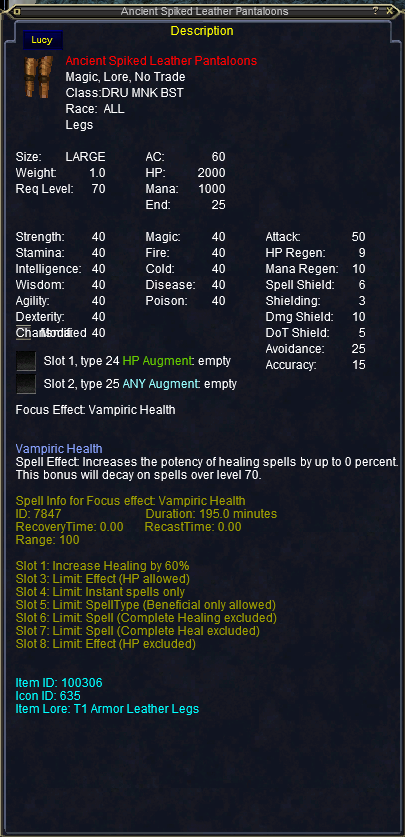
Ancient Spiked Leather Pantaloons
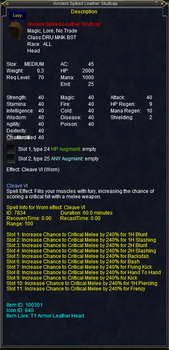
Ancient Spiked Leather Skullcap
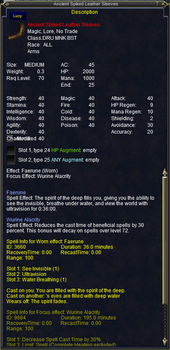
Ancient Spiked Leather Sleeves
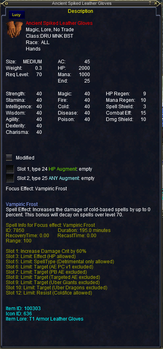
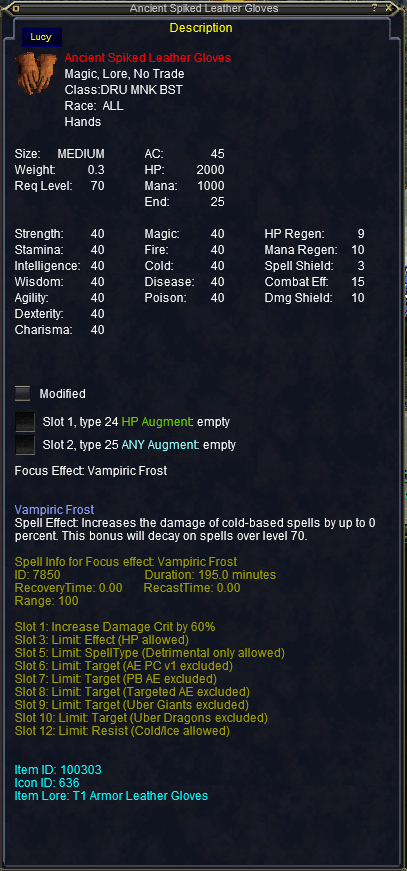
Ancient Spiked Leather Gloves
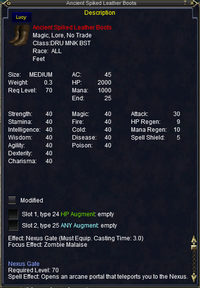
Ancient Spiked Leather Boots

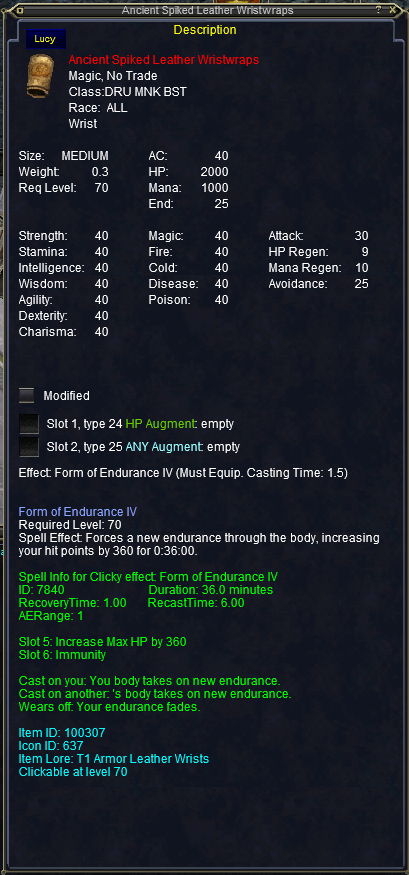
Ancient Spiked Leather Wristwraps


T2 - Plane of Dragons
Click Image(s) for larger image.
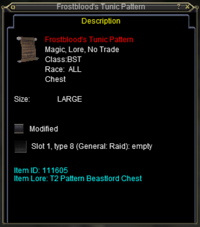
Frostbloods's Tunic Pattern

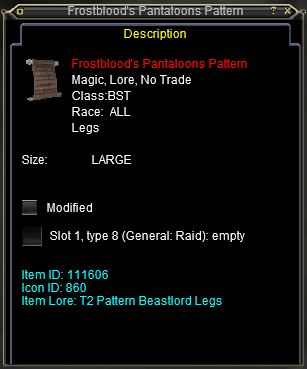
Frostbloods's Pantaloons Pattern
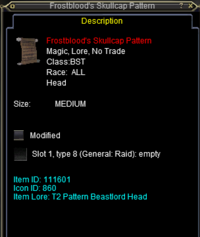
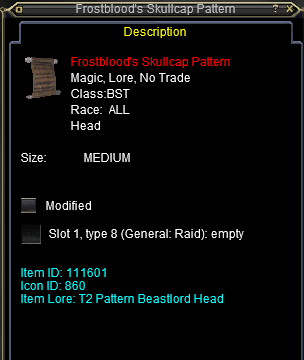
Frostbloods's Skullcap Pattern
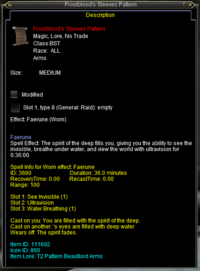
Frostbloods's Sleeves Pattern
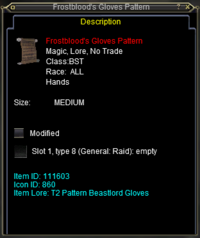
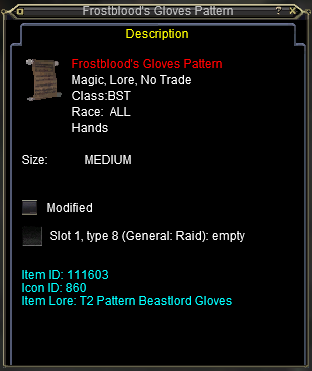
Frostbloods's Gloves Pattern

Frostbloods's Boots Pattern

Frostbloods's Wristwraps Pattern
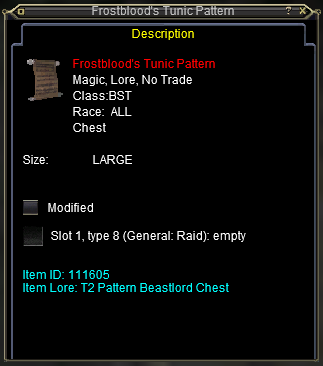


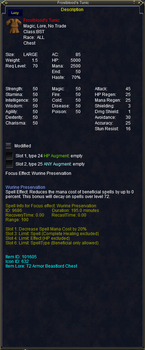
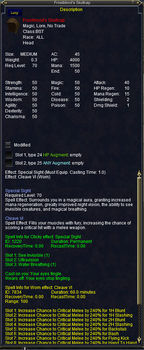
Frostbloods's Tunic
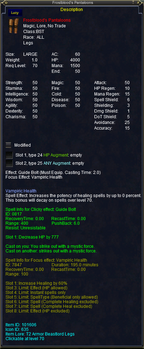
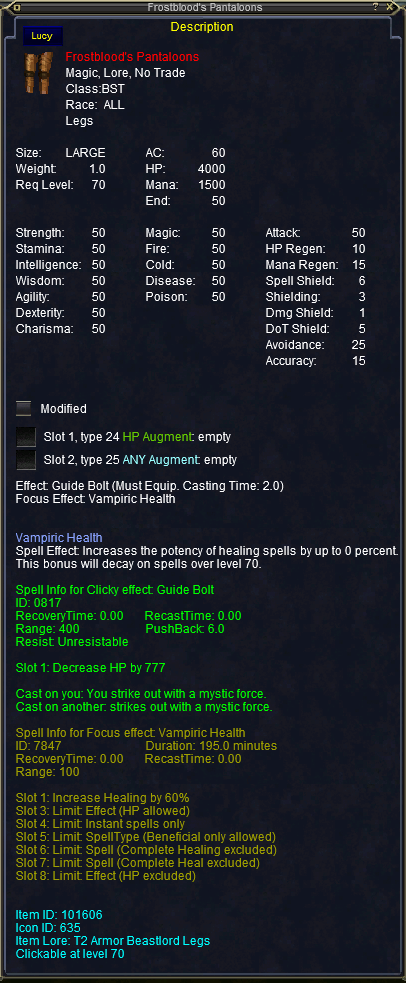
Frostbloods's Pantaloons
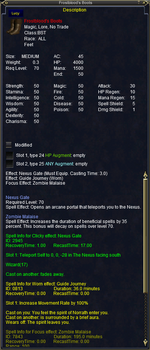
Frostbloods's Skullcap
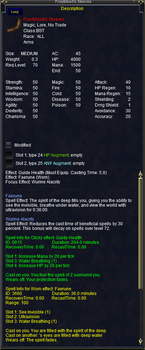
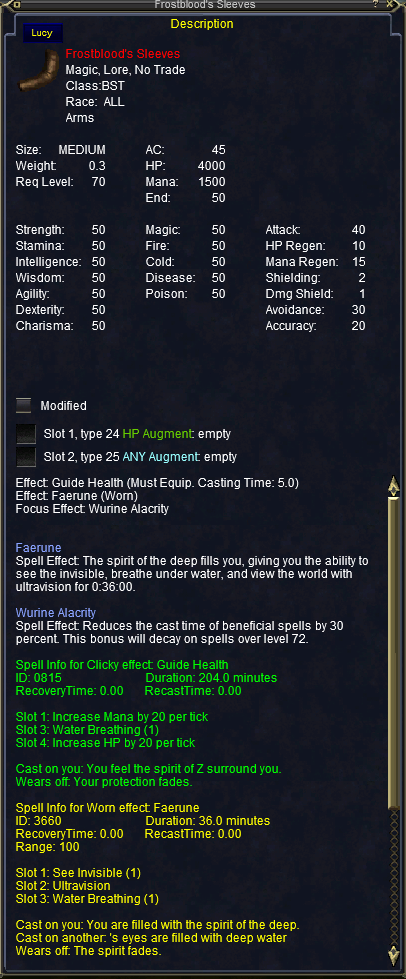
Frostbloods's Sleeves

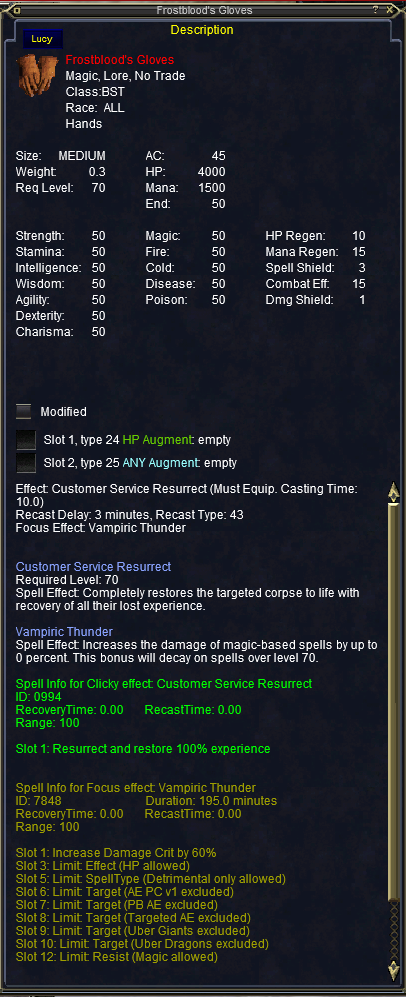
Frostbloods's Gloves
Frostbloods's Boots
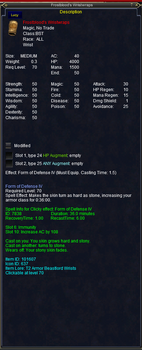
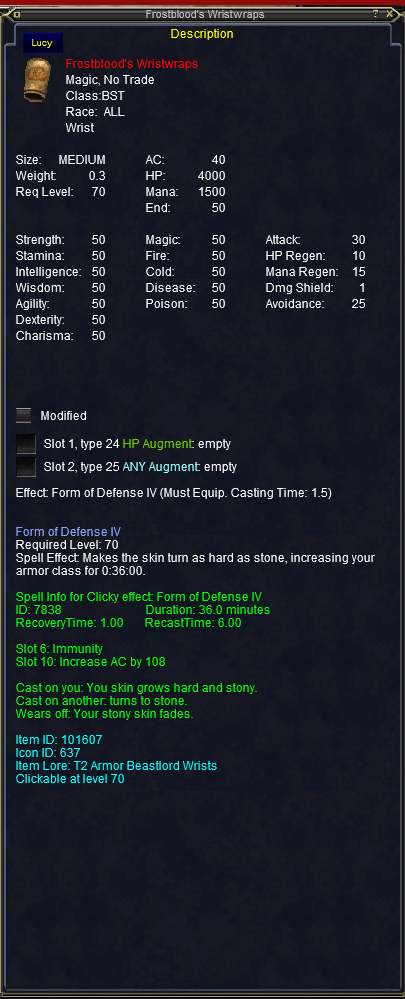
Frostbloods's Wristwraps


T3 - Airplane
Click Image(s) for larger image.
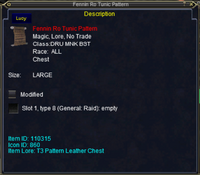
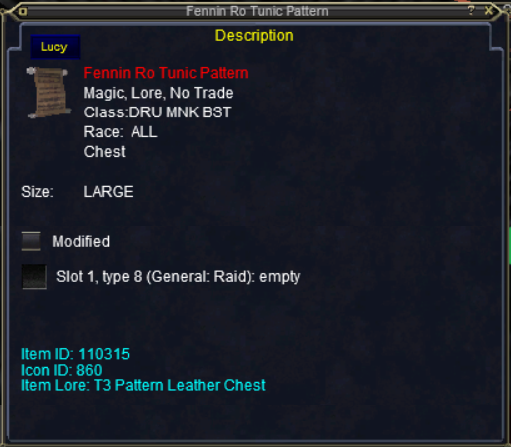
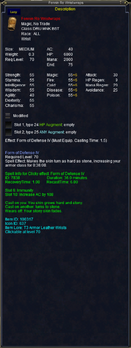
Fennin Ro Tunic Pattern
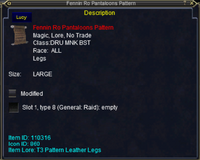
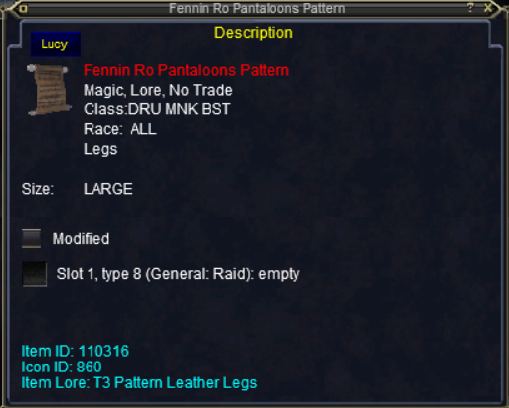
Fennin Ro Pantaloons Pattern
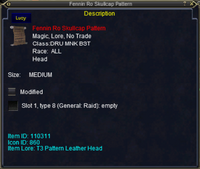
Fennin Ro Skullcap Pattern

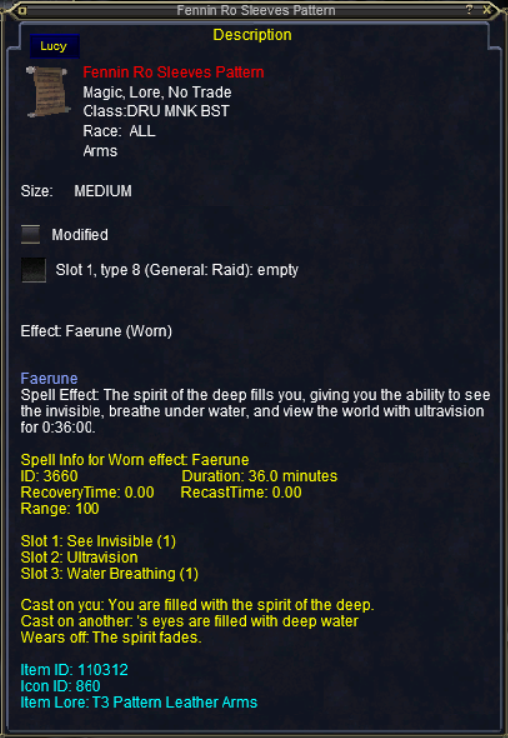
Fennin Ro Sleeves Pattern

Fennin Ro Gloves Pattern
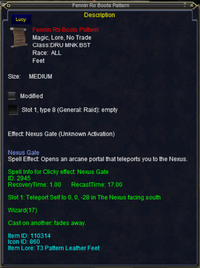
Fennin Ro Boots Pattern
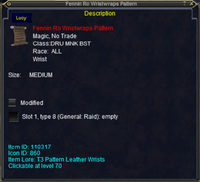
Fennin Ro Wristwraps Pattern

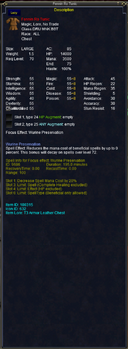
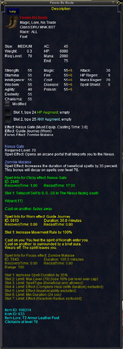
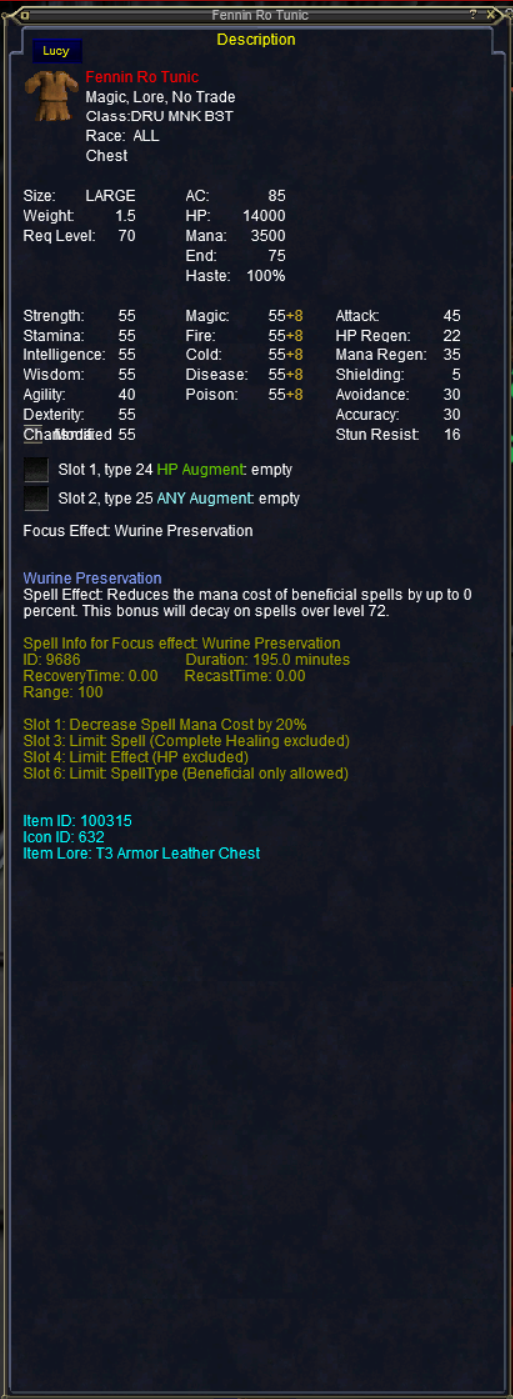
Fennin Ro Tunic

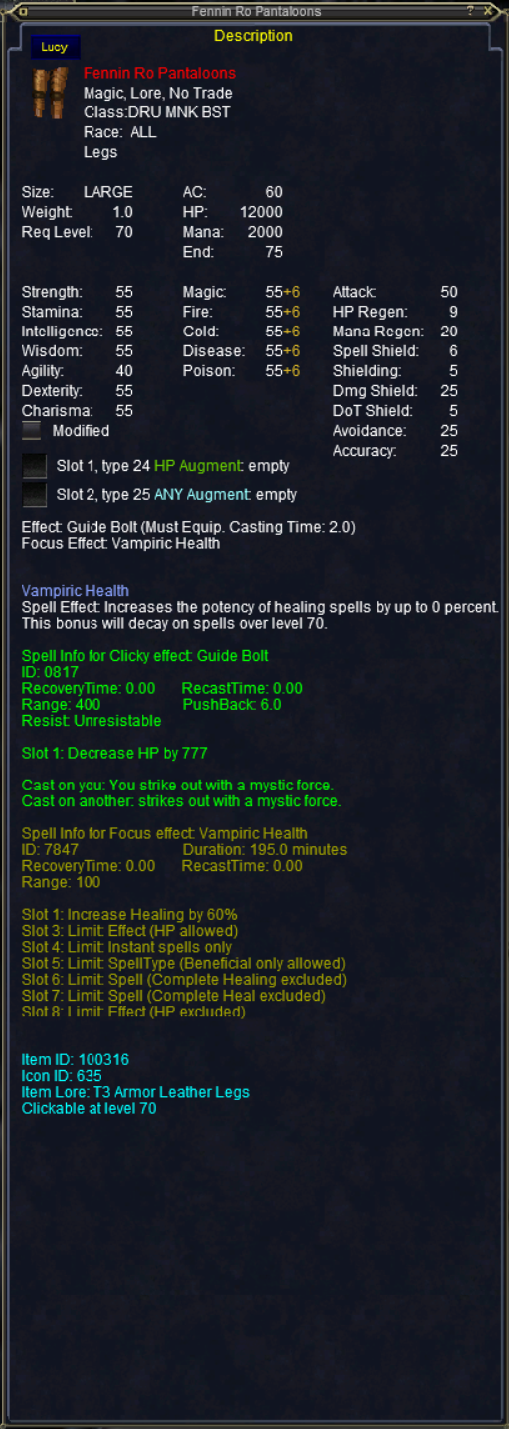
Fennin Ro Pantaloons
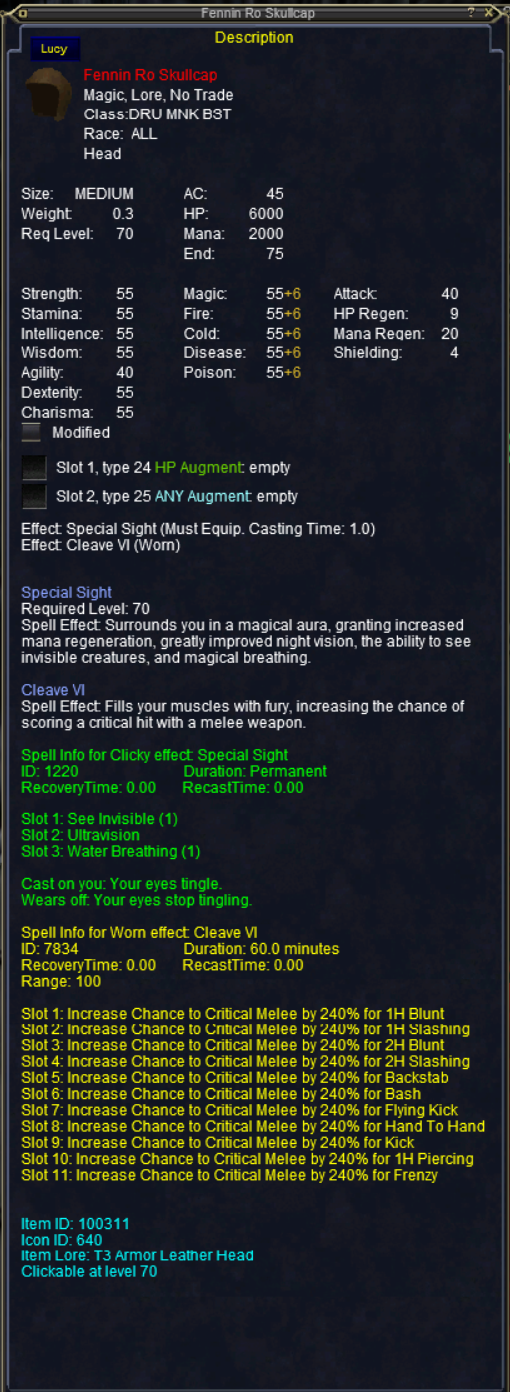
Fennin Ro Skullcap
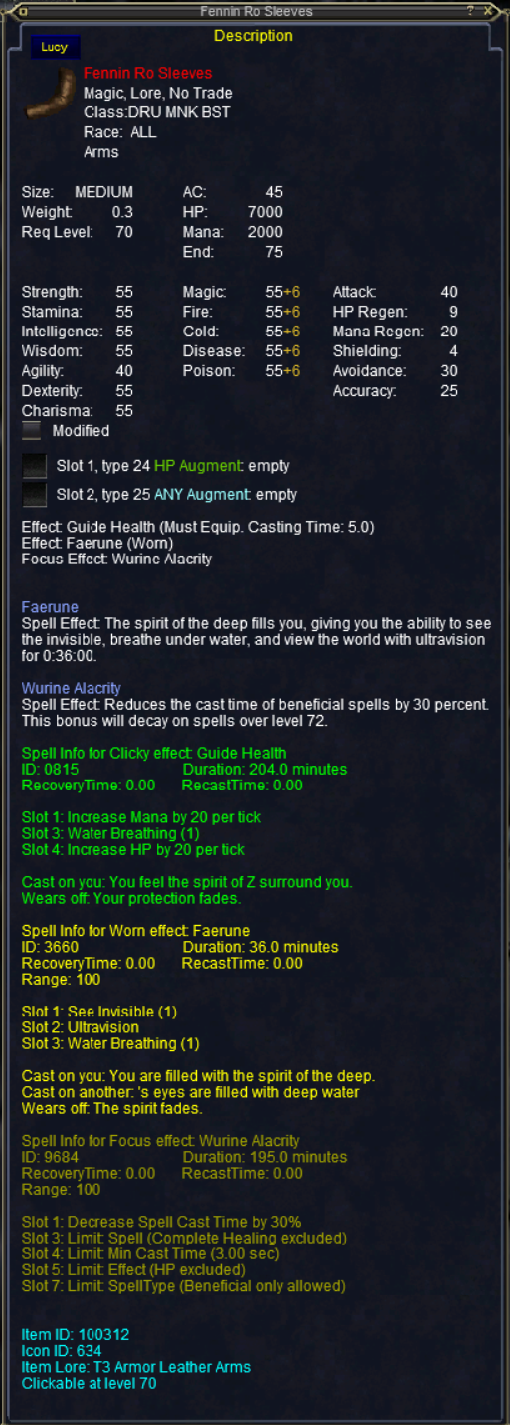
Fennin Ro Sleeves
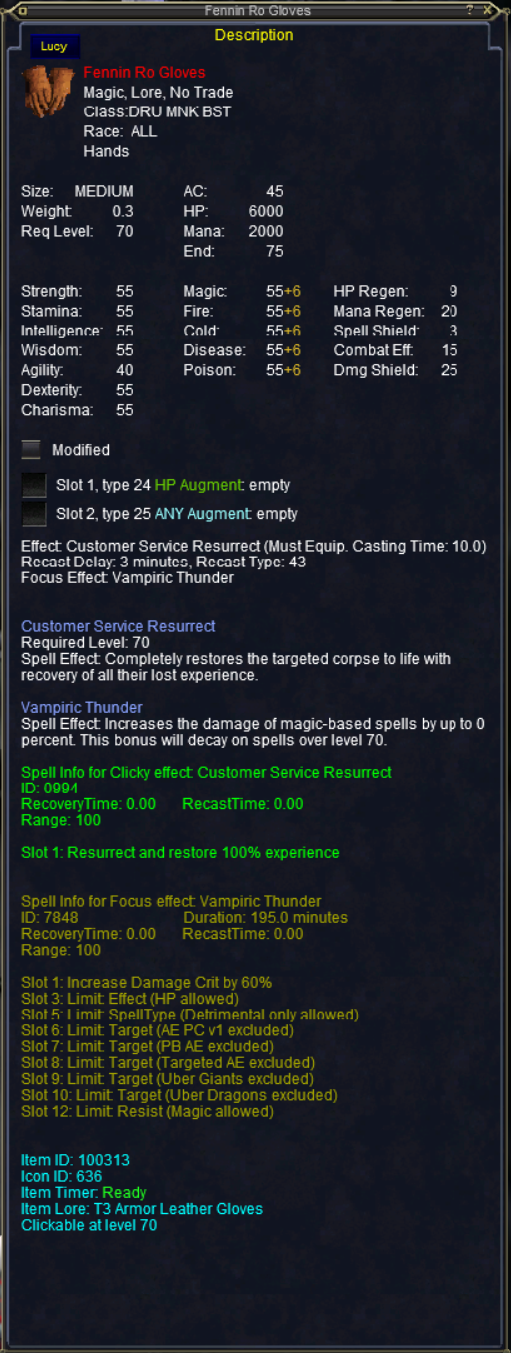
Fennin Ro Gloves
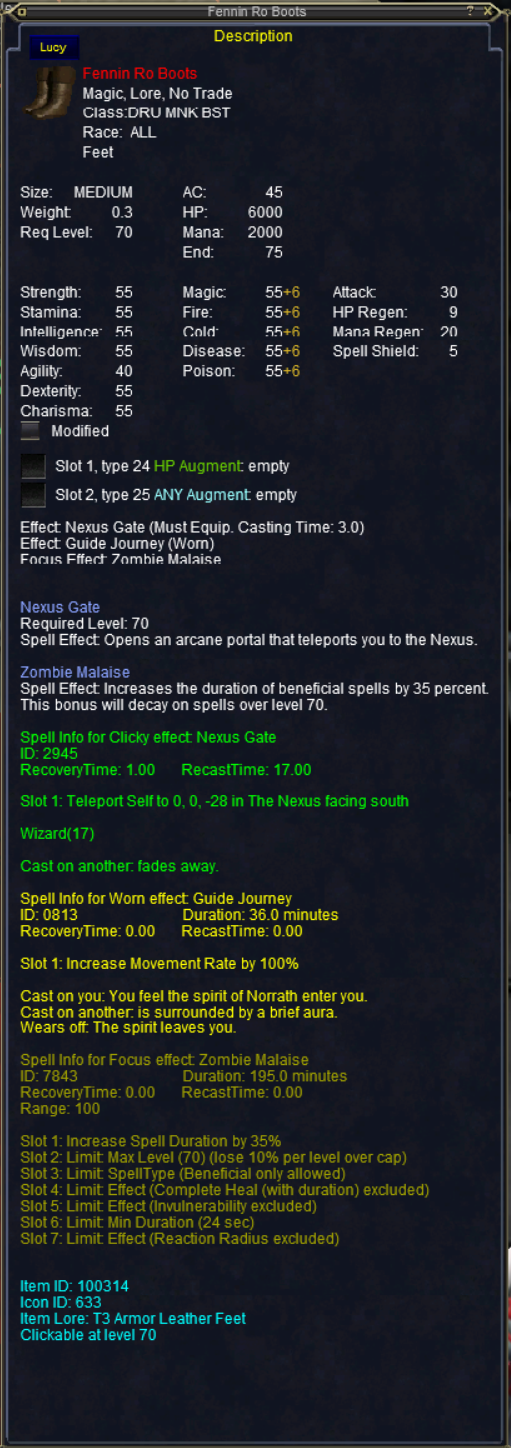
Fennin Ro Boots
Fennin Ro Wristwraps

T4 - Airplane
Click Image(s) for larger image.
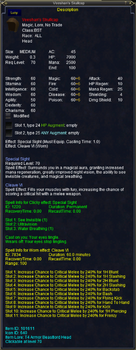
Veeshan's Tunic Pattern

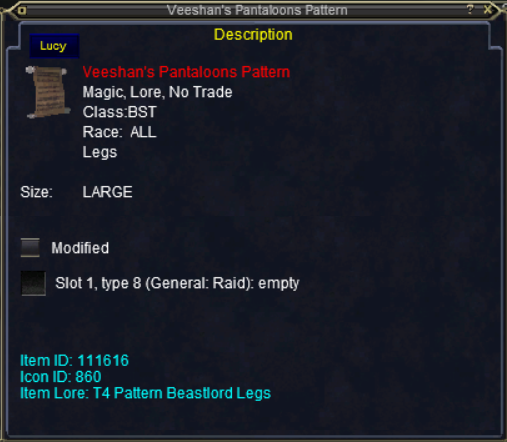
Veeshan's Pantaloons Pattern
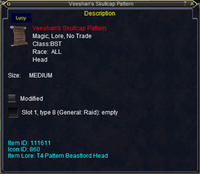
Veeshan's Skullcap Pattern
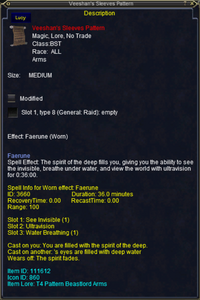
Veeshan's Sleeves Pattern

Veeshan's Gloves Pattern
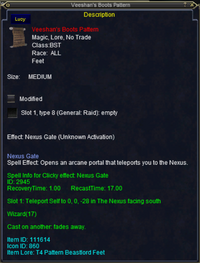
Veeshan's Boots Pattern

Veeshan's Wristwraps Pattern


Veeshan's Tunic

Veeshan's Pantaloons
Veeshan's Skullcap
Veeshan's Sleeves
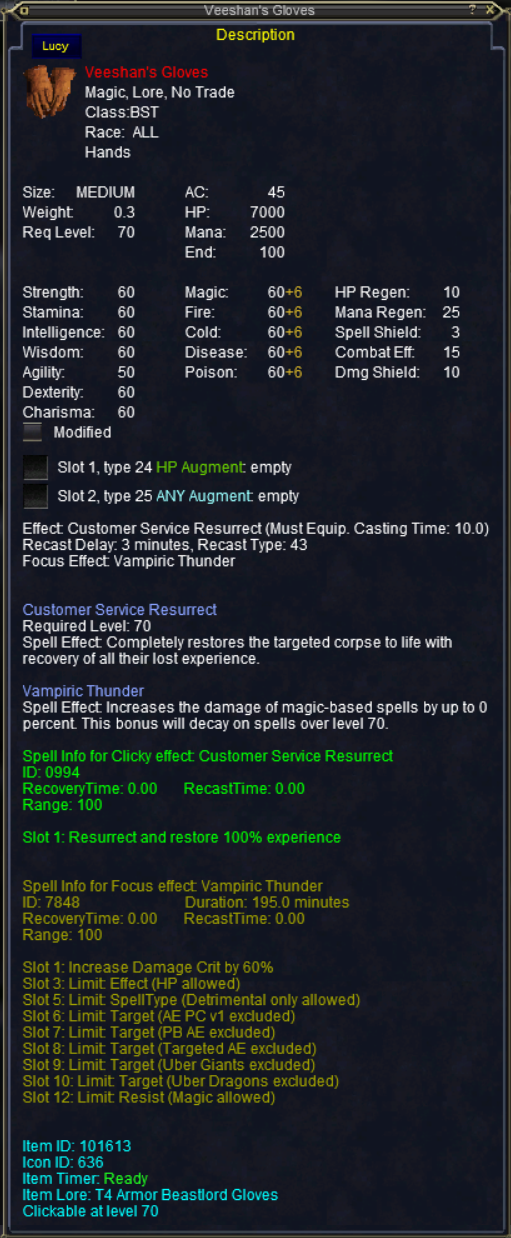
Veeshan's Gloves
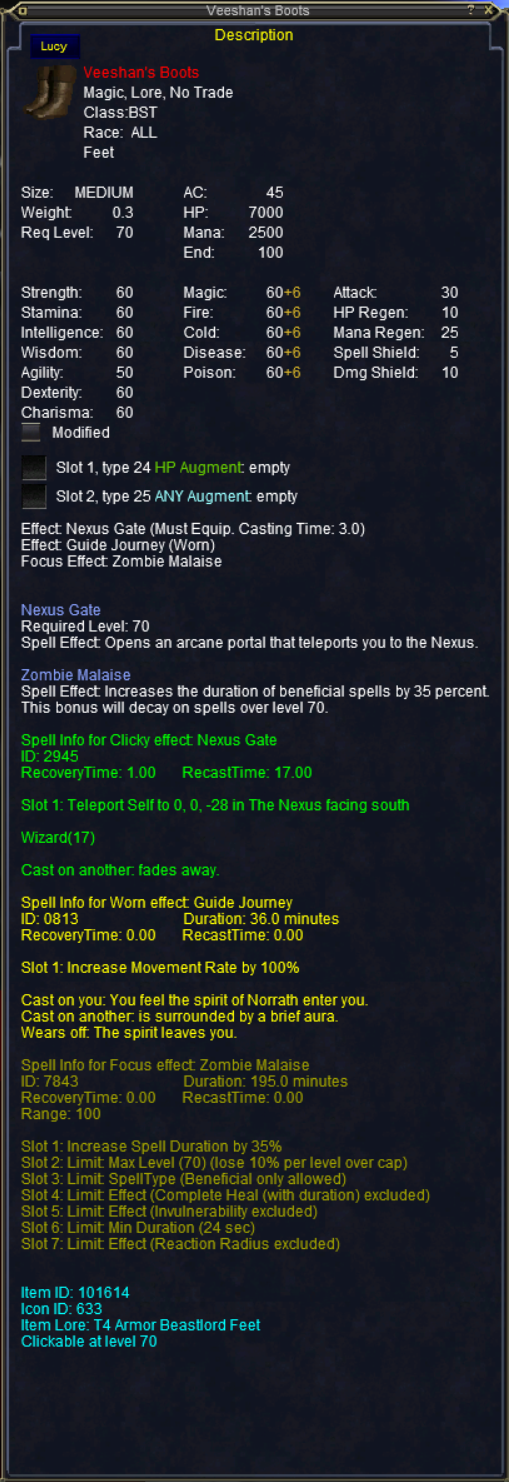
Veeshan's Boots
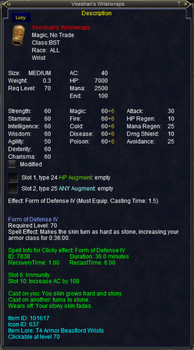
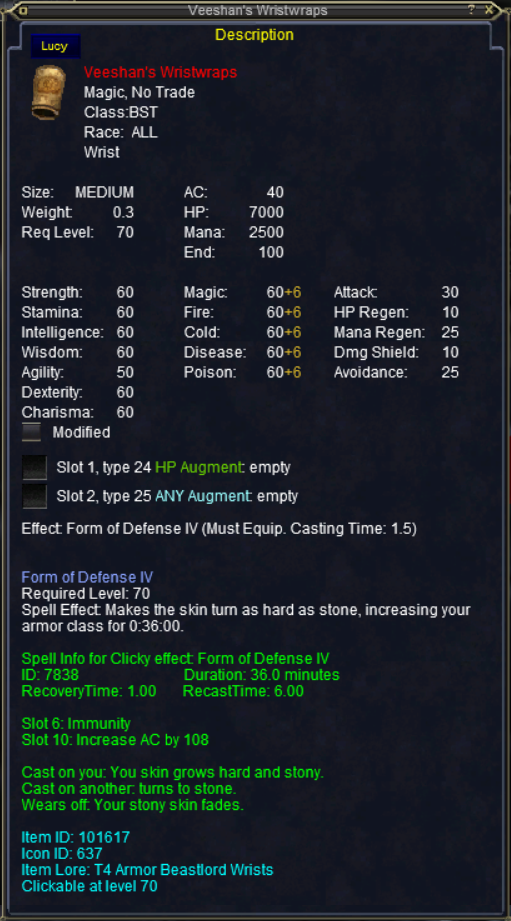
Veeshan's Wristwraps
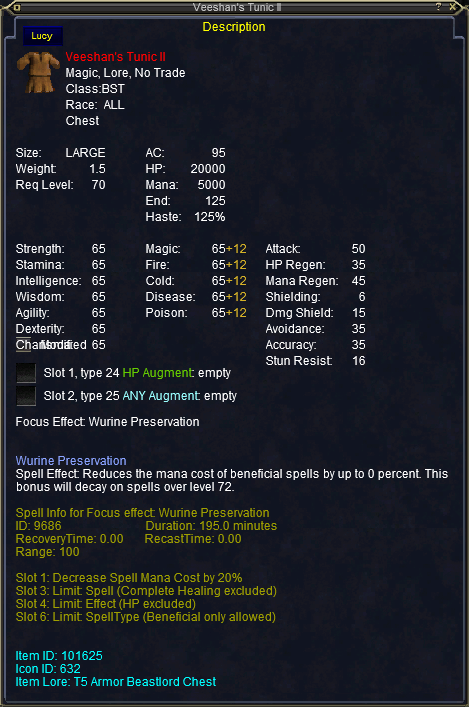
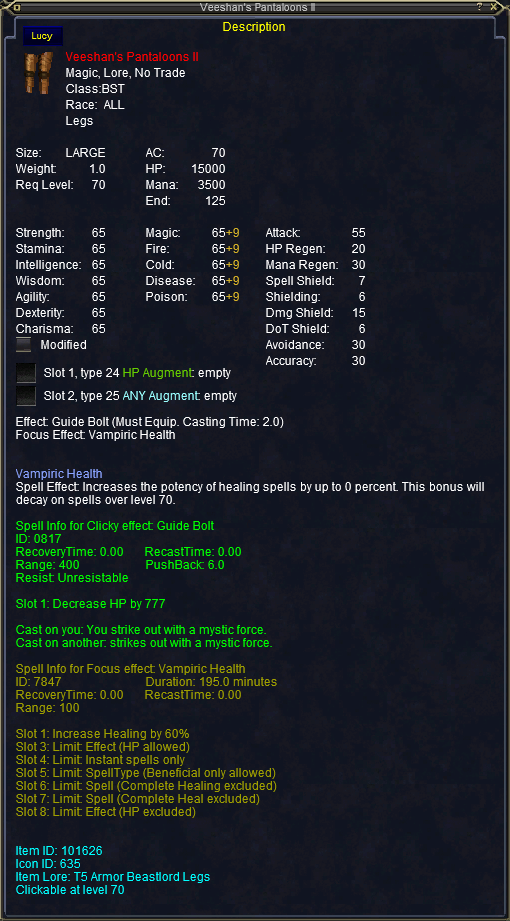
T5 - Abyss
Click Image(s) for larger image.
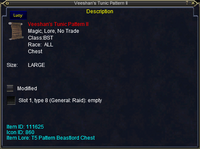
Veeshan's Tunic Pattern II
Veeshan's Pantaloons Pattern II

Veeshan's Skullcap Pattern II
Veeshan's Sleeves Pattern II
Veeshan's Gloves Pattern II
Veeshan's Boots Pattern II
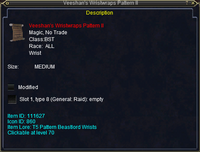
Veeshan's Wristwraps Pattern II

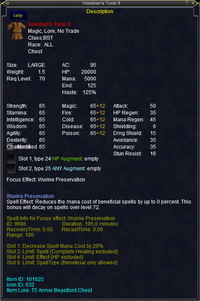
Veeshan's Tunic II
Veeshan's Pantaloons II
Veeshan's Skullcap II
Veeshan's Sleeves II
Veeshan's Gloves II
Veeshan's Boots II
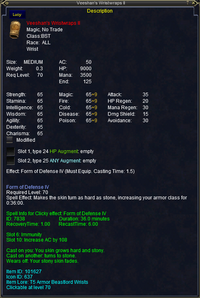
Veeshan's Wristwraps II


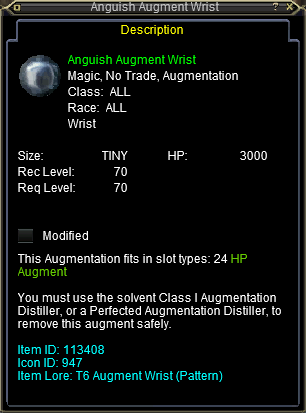
T6 - Anguish
Click Image(s) for larger image.
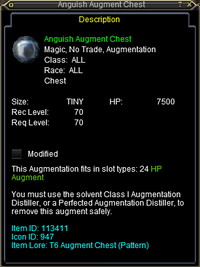
Anguish Augment Chest
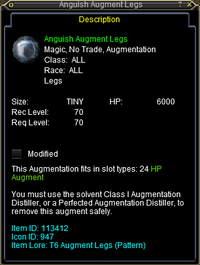
Anguish Augment Legs

Anguish Augment Head
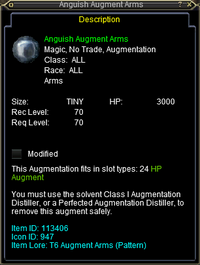
Anguish Augment Arms

Anguish Augment Hands
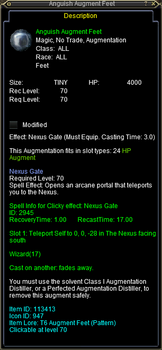
Anguish Augment Feet
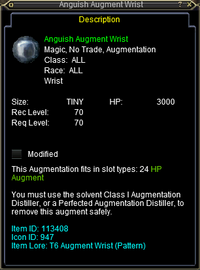
Anguish Augment Wrist


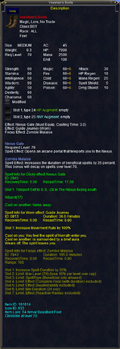
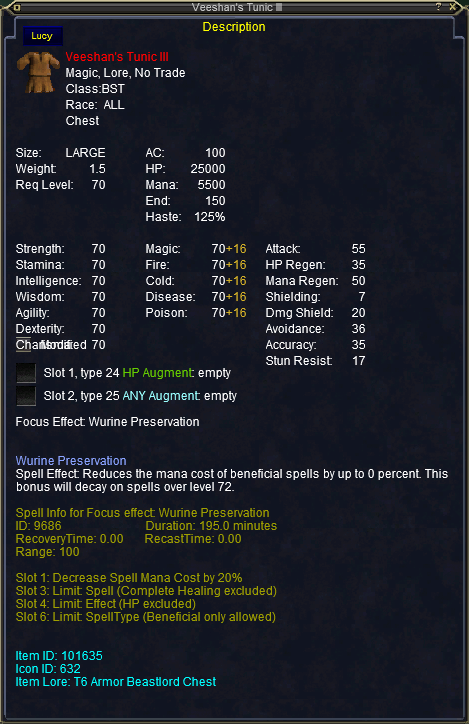
Veeshan's Tunic III
Veeshan's Pantaloons III
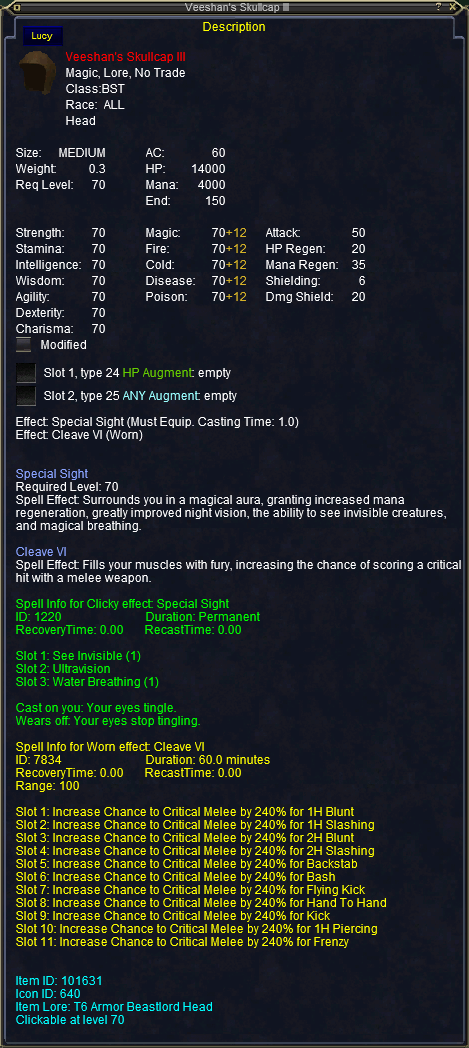
Veeshan's Skullcap III

Veeshan's Sleeves III
Veeshan's Gloves III
Veeshan's Boots III
Veeshan's Wristwraps III


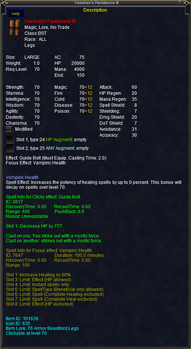
T7 - Loping Plains
Click Image(s) for larger image.
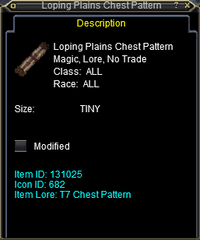
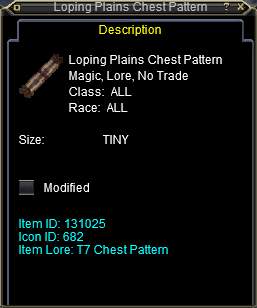
Loping Plains Chest Pattern
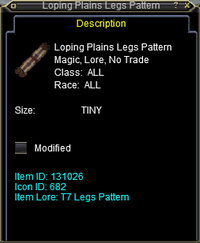
Loping Plains Legs Pattern

Loping Plains Head Pattern

Loping Plains Arms Pattern
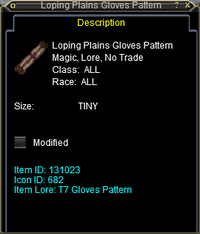
Loping Plains Gloves Pattern
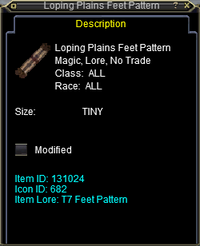
Loping Plains Feet Pattern

Loping Plains Wrist Pattern


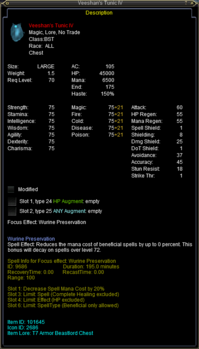
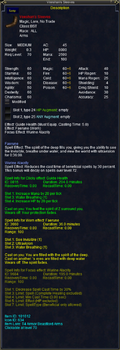
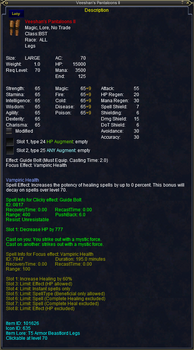
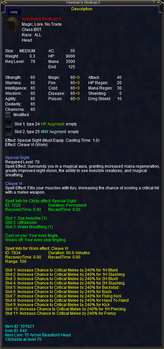
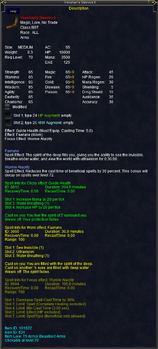
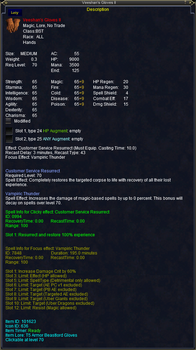
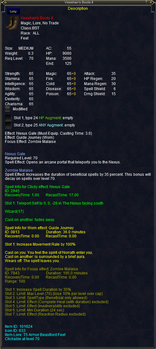
Veeshan's Tunic IV

Veeshan's Pantaloons IV
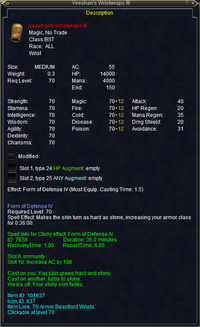
Veeshan's Skullcap IV
Veeshan's Sleeves IV

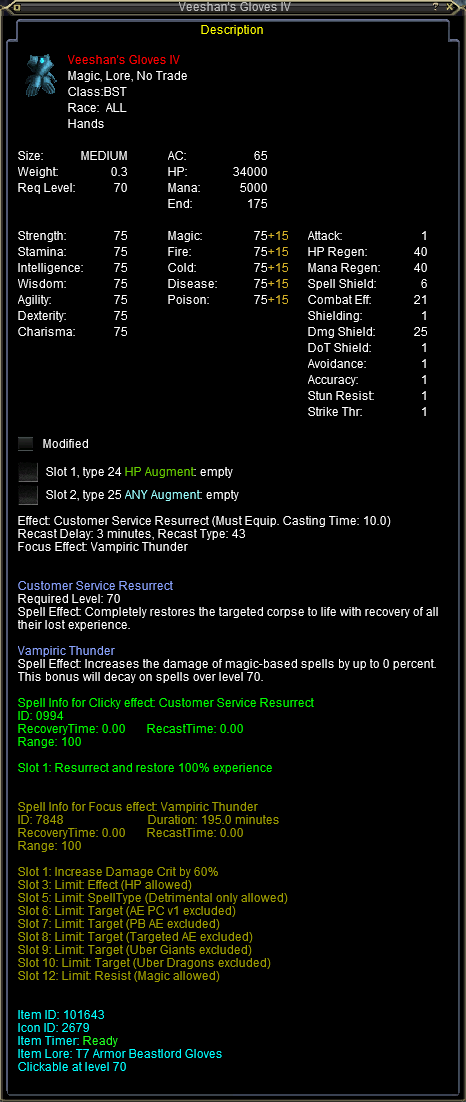
Veeshan's Gloves IV
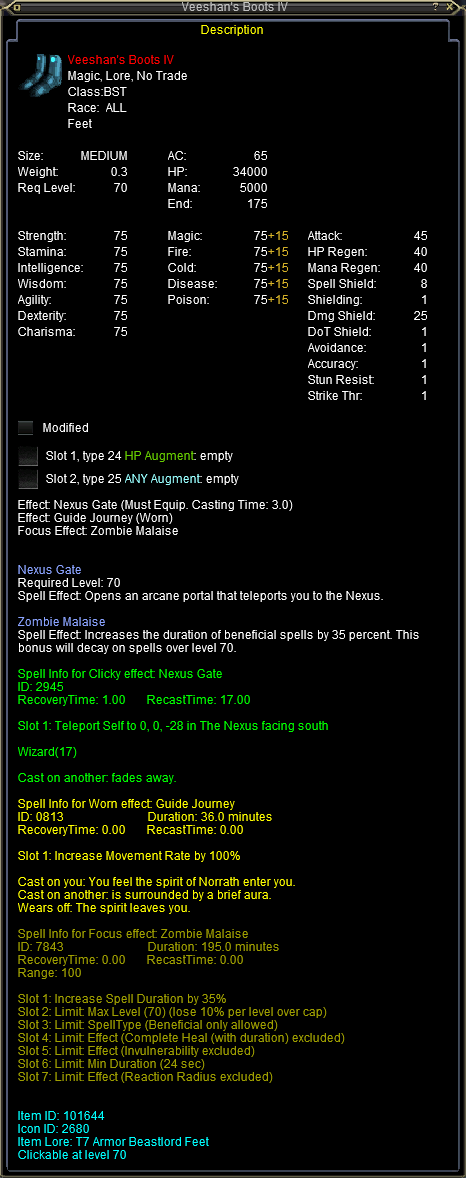
Veeshan's Boots IV

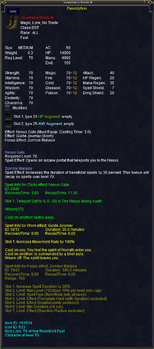
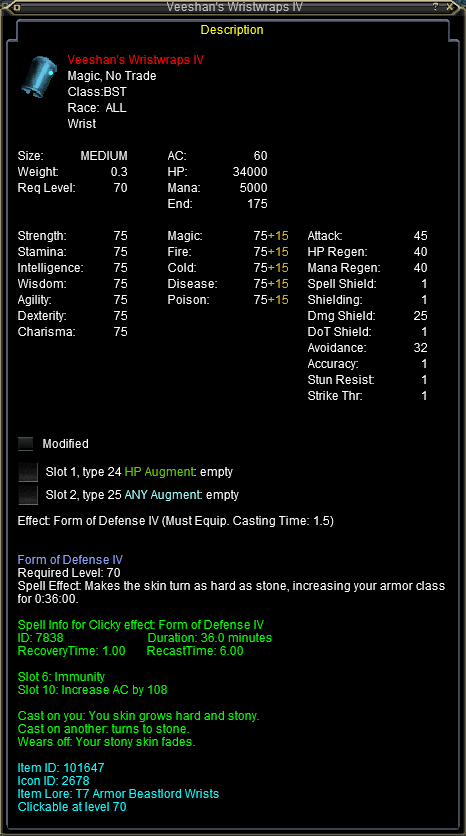
Veeshan's Wristwraps IV


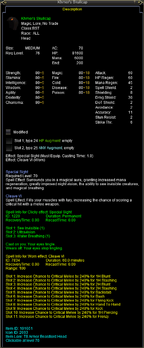
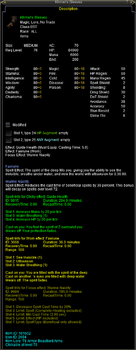
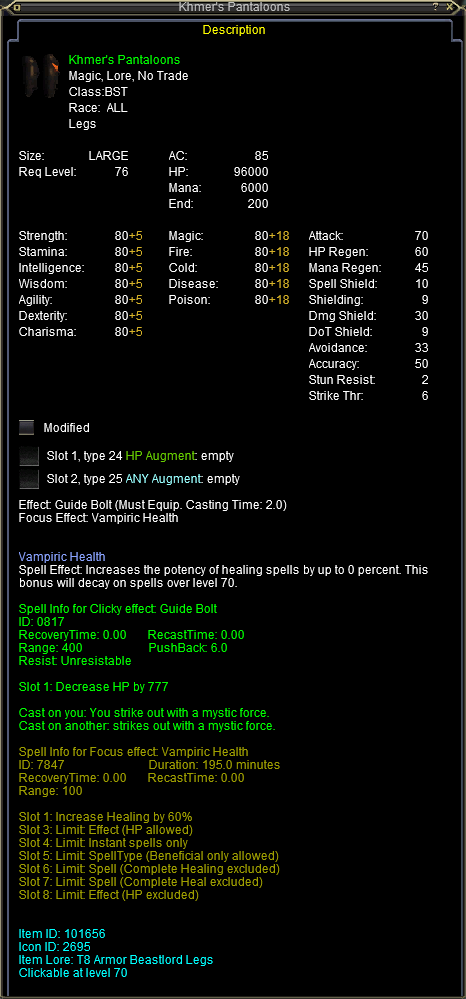
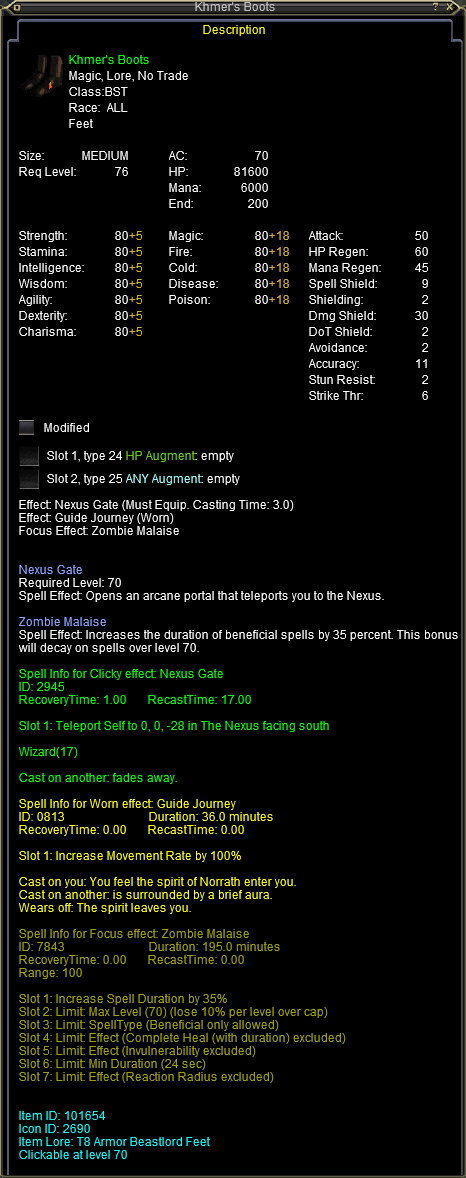
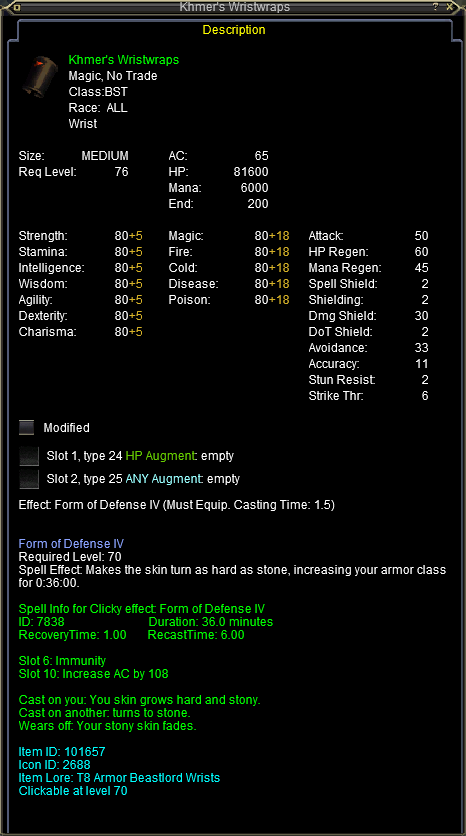
T8 - Temple Veeshan
Click Image(s) for larger image.
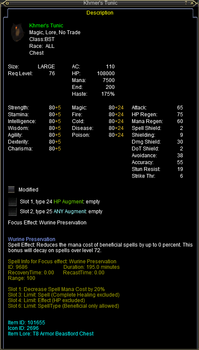
Khmer's Tunic

Khmer's Pantaloons
Khmer's Skullcap
Khmer's Sleeves
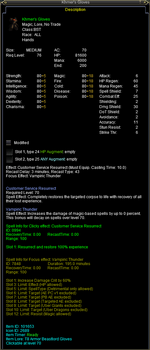
Khmer's Gloves

Khmer's Boots

Khmer's Wristwraps


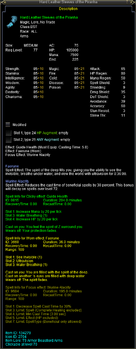
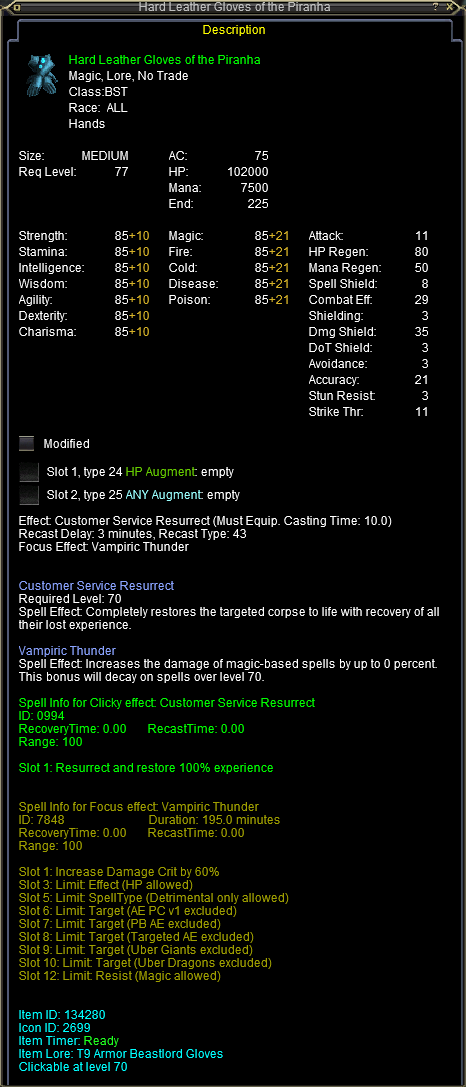
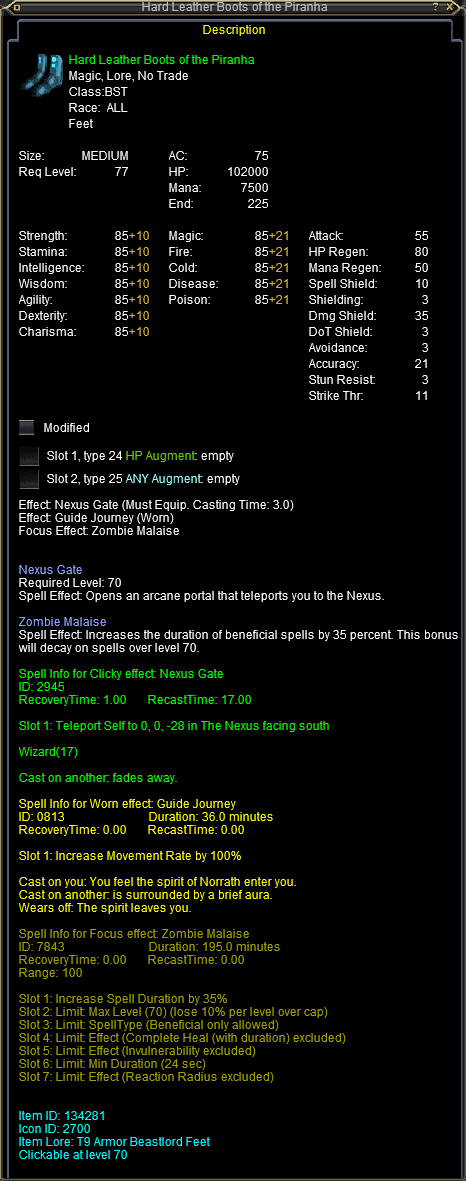
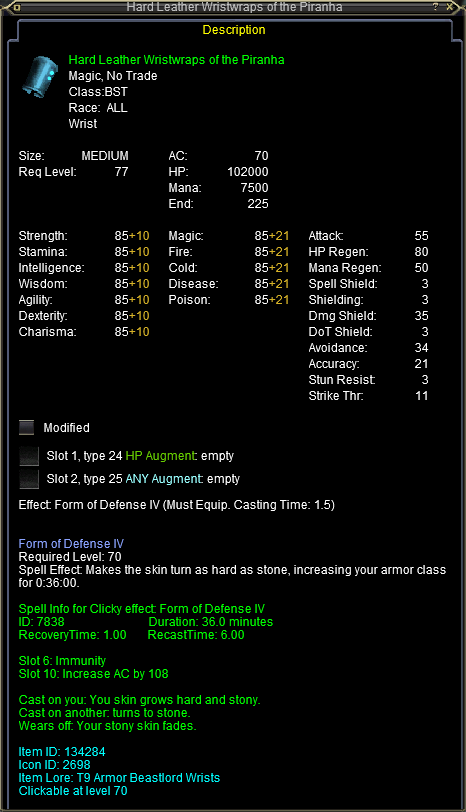
T9 - Old Commons
Click Image(s) for larger image.
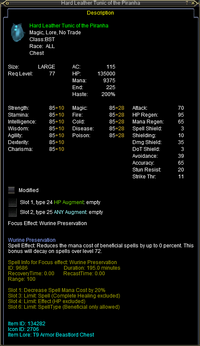
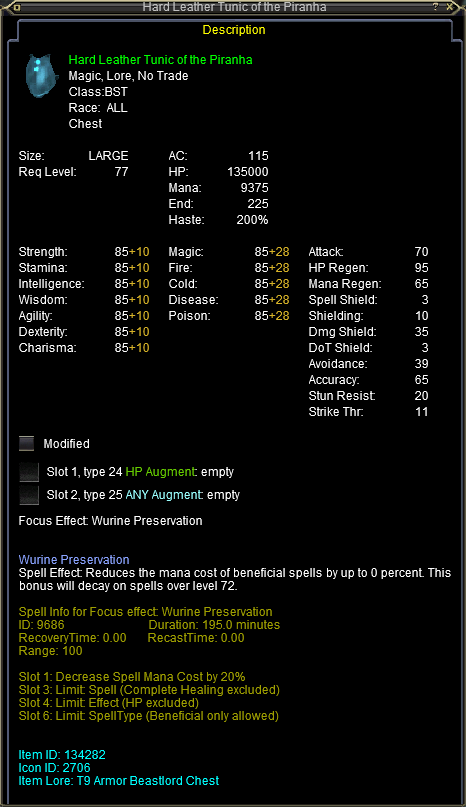
Hard Leather Tunic of the Piranha

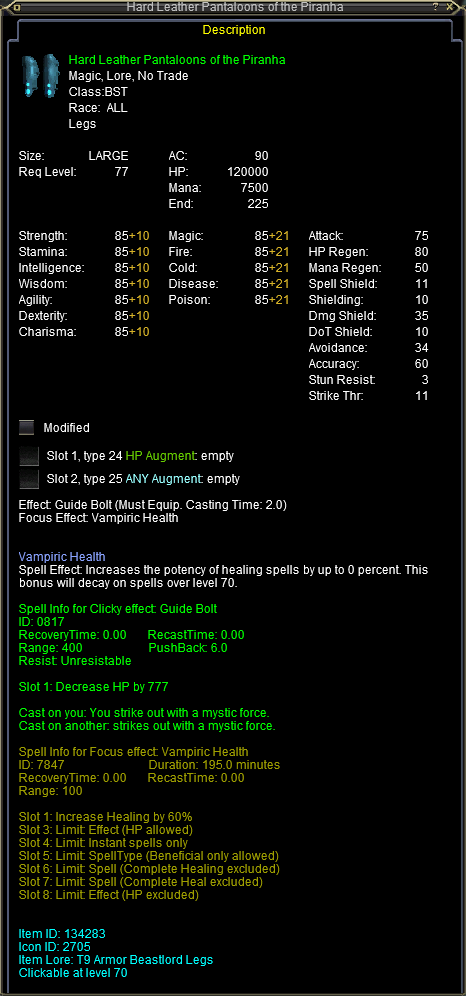
Hard Leather Pantaloons of the Piranha

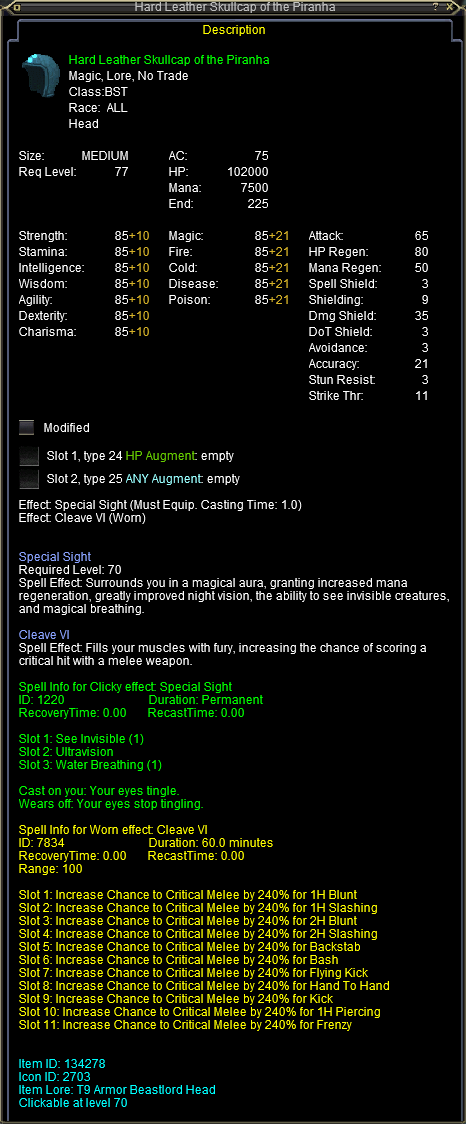
Hard Leather Skullcap of the Piranha
Hard Leather Sleeves of the Piranha

Hard Leather Gloves of the Piranha

Hard Leather Boots of the Piranha
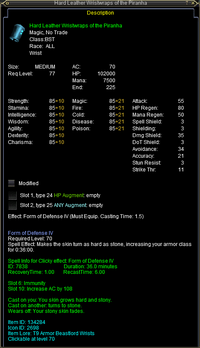
Hard Leather Wristwraps of the Piranha

T10 - Sunderock - Orc
Click Image(s) for larger image.
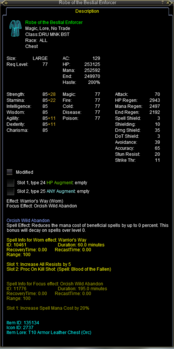
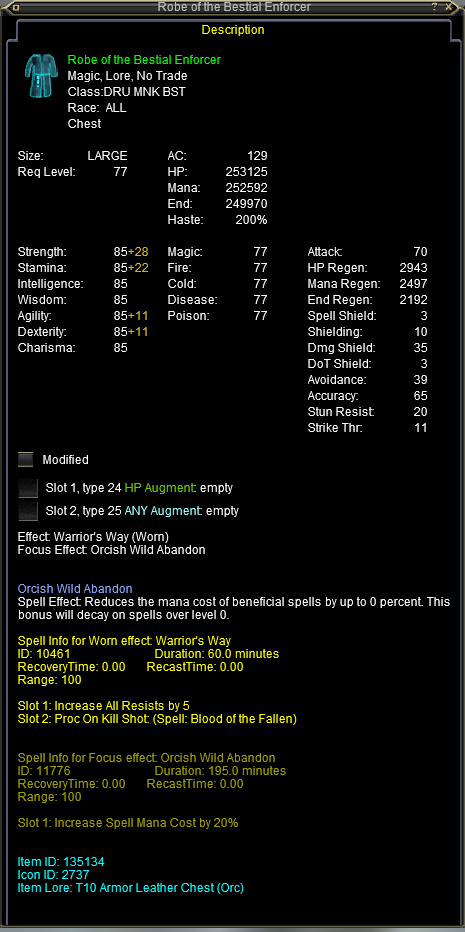
T10 Orc Leather Chest
Robe of the Bestial Enforcer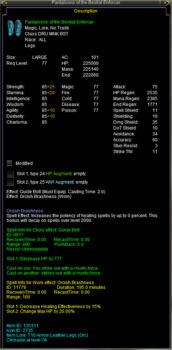
T10 Orc Leather Legs
Pantaloons of the Bestial Enforcer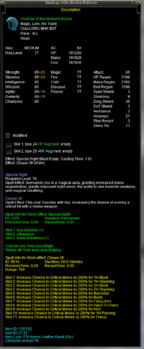
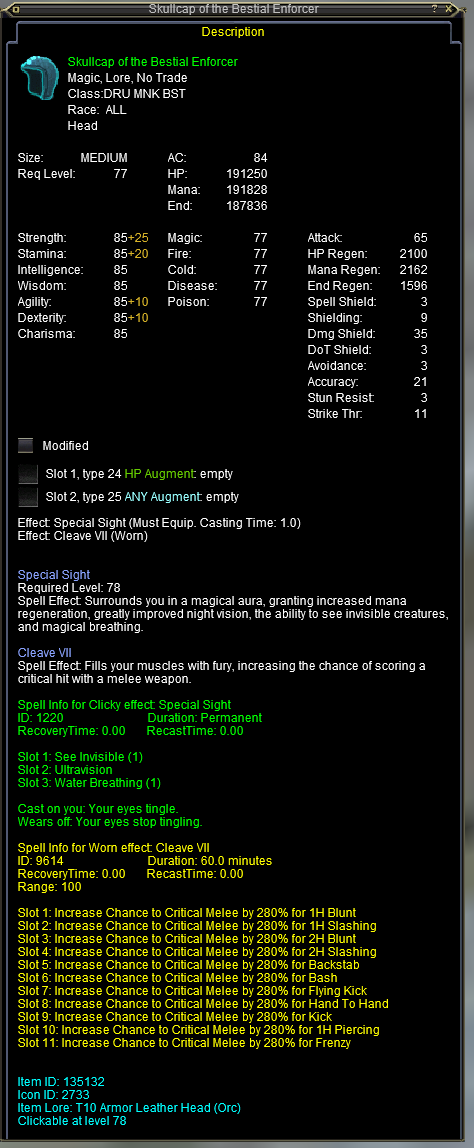
T10 Orc Leather Helm
Skullcap of the Bestial Enforcer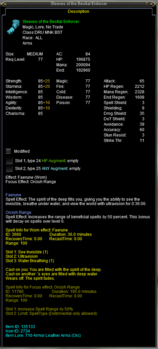
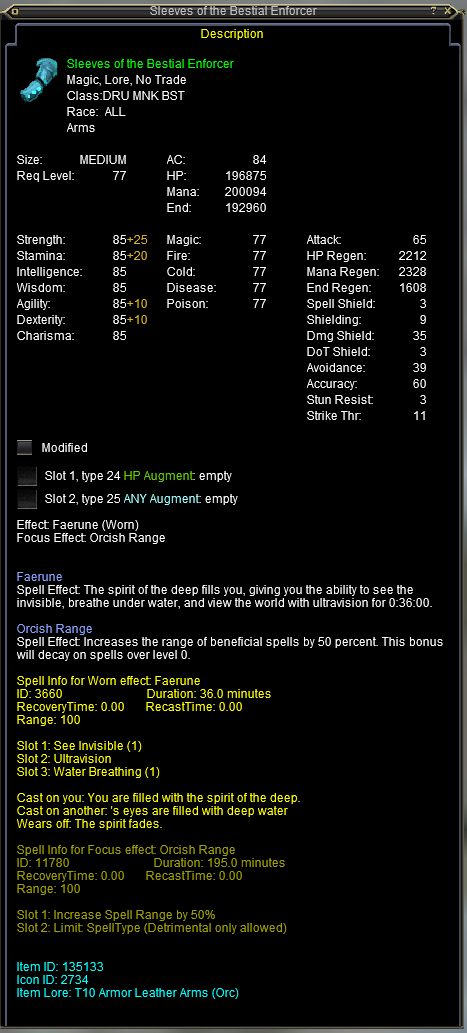
T10 Orc Leather Arms
Sleeves of the Bestial Enforcer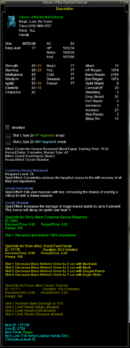
T10 Orc Leather Hands
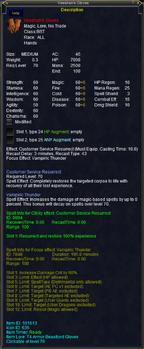
Gloves of the Bestial Enforcer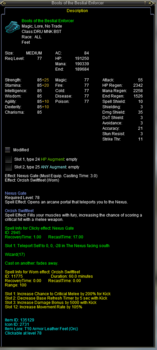
T10 Orc Leather Feet
Boots of the Bestial Enforcer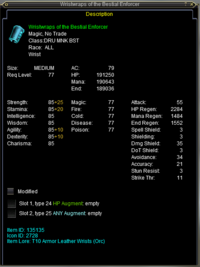
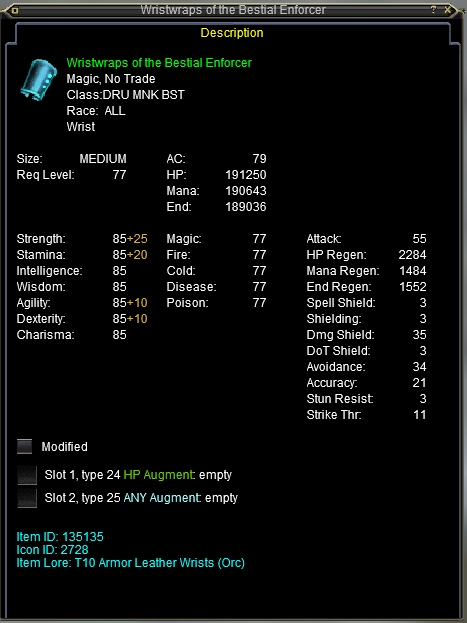
T10 Orc Leather Wrists
Wristwraps of the Bestial Enforcer


T10 - Sunderock - Gnoll
Click Image(s) for larger image.
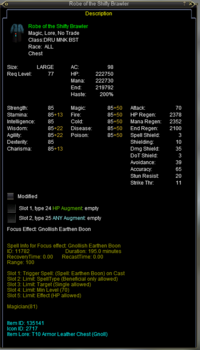
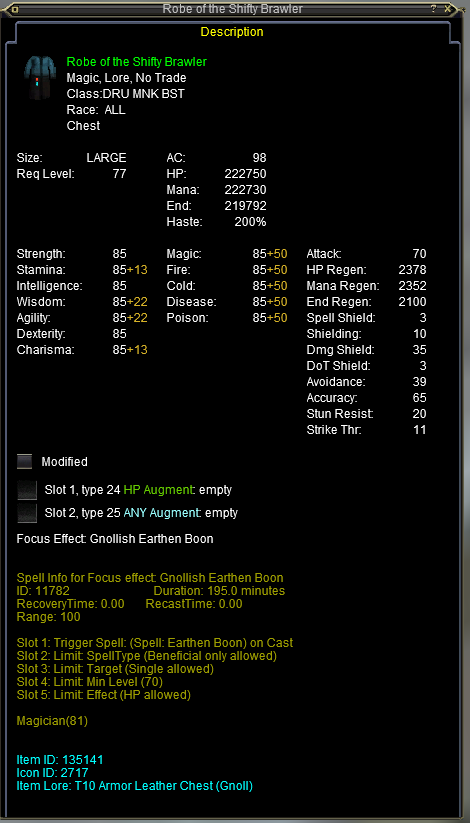
T10 Gnoll Leather Chest
Robe of the Shifty Brawler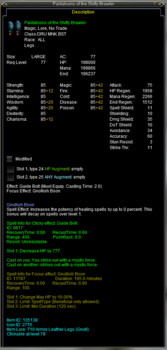
T10 Gnoll Leather Legs
Pantaloons of the Shifty Brawler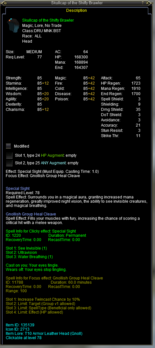
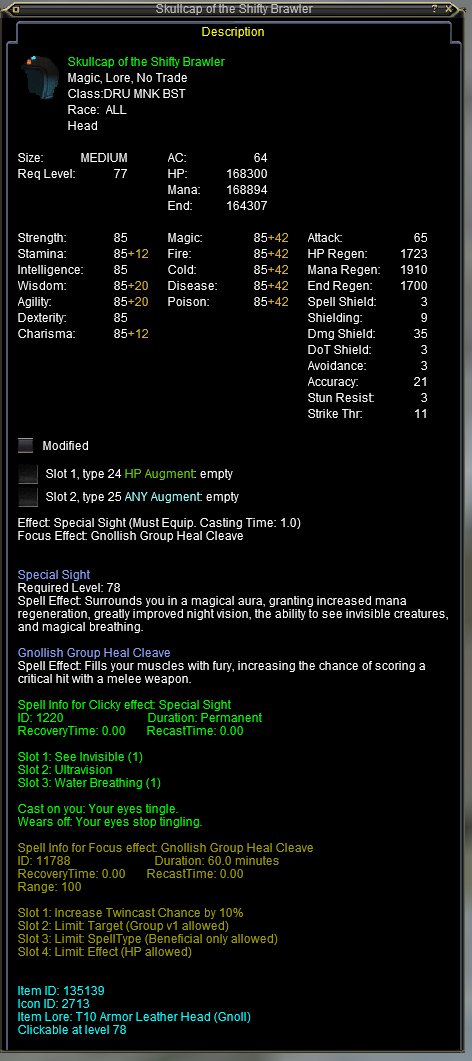
T10 Gnoll Leather Helm
Skullcap of the Shifty Brawler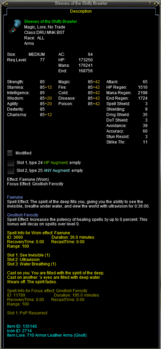
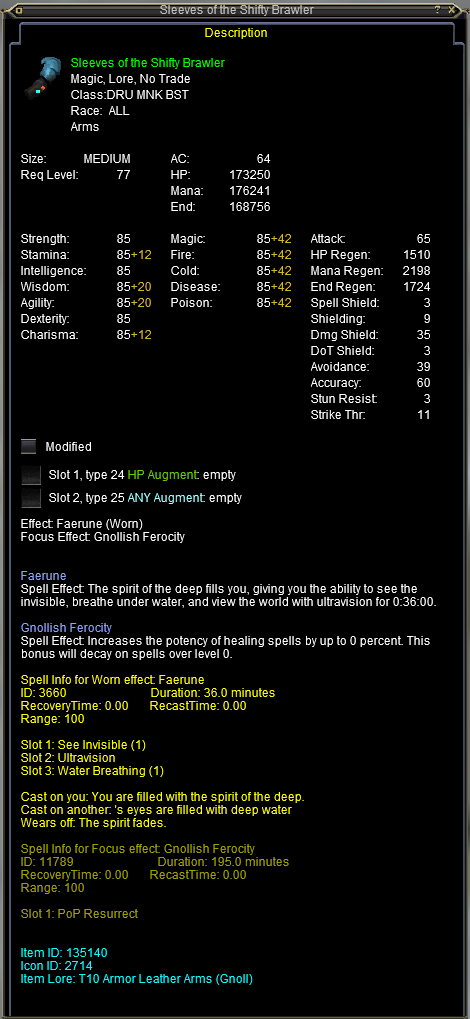
T10 Gnoll Leather Arms
Sleeves of the Shifty Brawler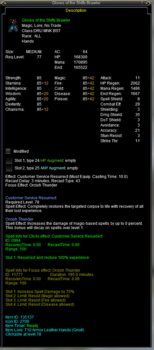
T10 Gnoll Leather Hands
Gloves of the Shifty Brawler
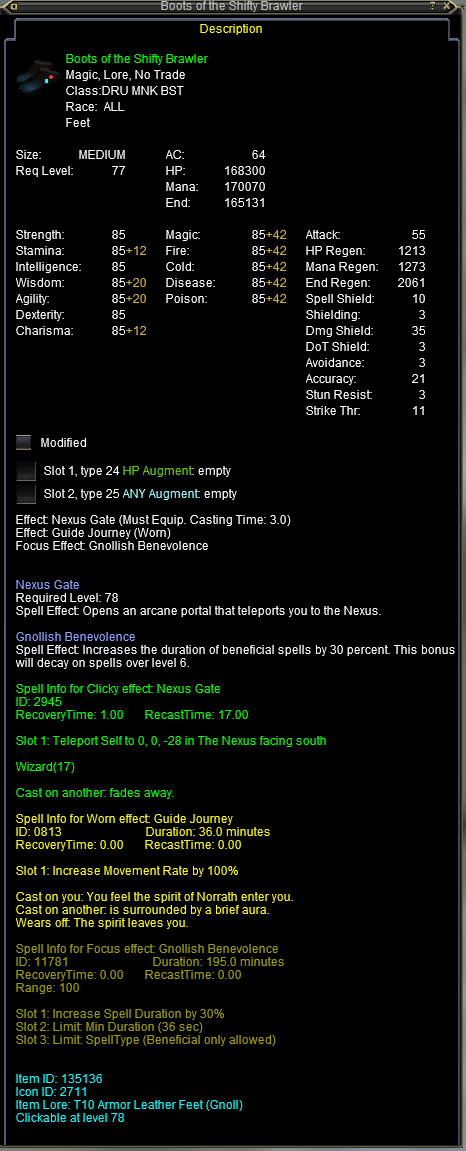
T10 Gnoll Leather Feet
Boots of the Shifty Brawler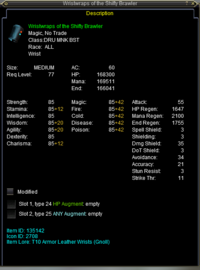
T10 Gnoll Leather Wrists
Wristwraps of the Shifty Brawler


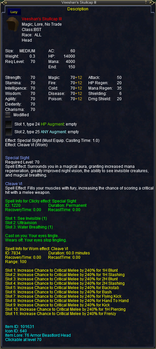
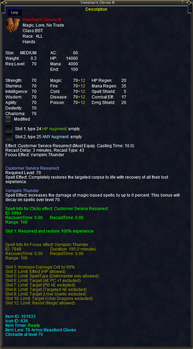
T10 - Sunderock - Sarnak
Click Image(s) for larger image.
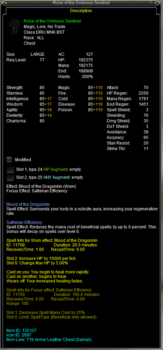
T10 Sarnak Leather Chest
Robe of the Ominous Sentinel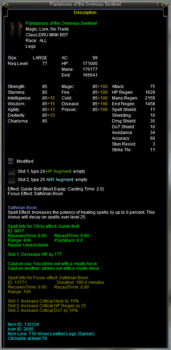
T10 Sarnak Leather Legs
Pantaloons of the Ominous Sentinel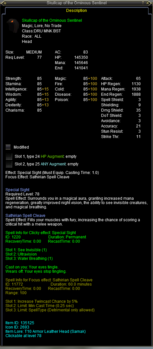
T10 Sarnak Leather Helm
Skullcap of the Ominous Sentinel
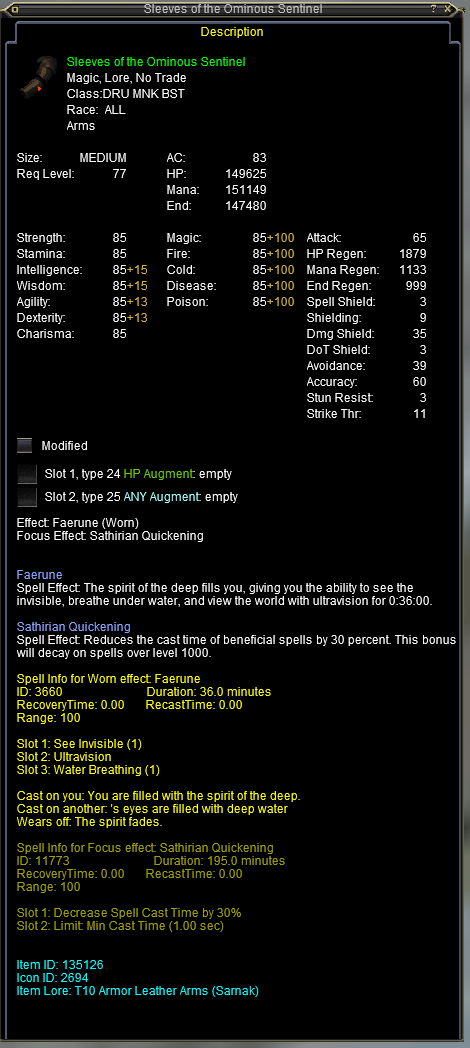
T10 Sarnak Leather Arms
Sleeves of the Ominous Sentinel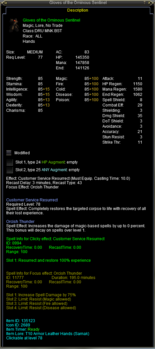
T10 Sarnak Leather Hands
Gloves of the Ominous Sentinel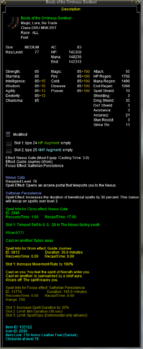
T10 Sarnak Leather Feet
Boots of the Ominous Sentinel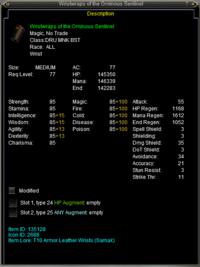
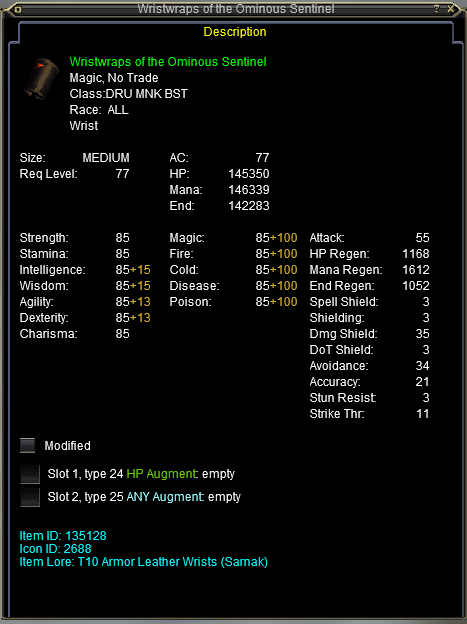
T10 Sarnak Leather Wrists
Wristwraps of the Ominous Sentinel